Let’s review how to set up postback (S2S) conversion tracking using 7SearchPPC and RedTrack in a simple, step-by-step manner.
The first step is to log in to 7SearchPPC as an advertiser. To get started, follow these steps:
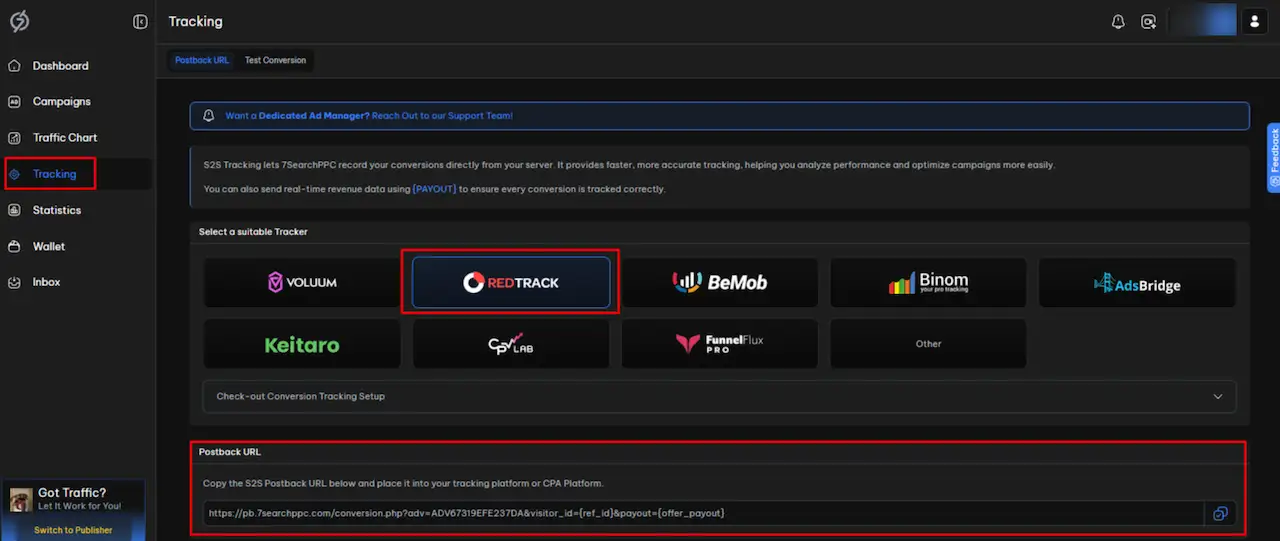
In the Advertiser Dashboard, go to the Tracking section and click on it. Select the RedTrack Tracker from the available list of trackers, then scroll down to locate the Postback URL. Simply copy that URL.
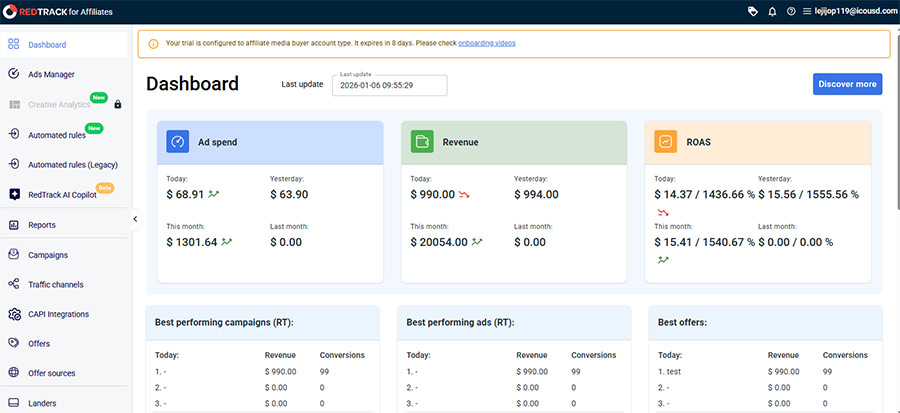
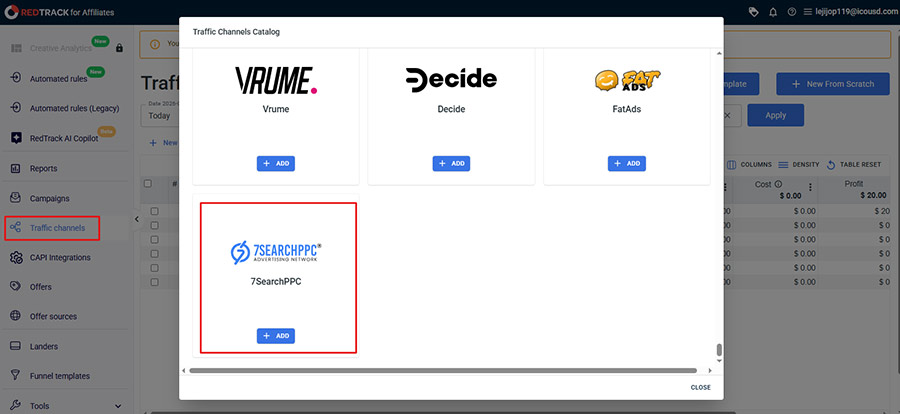
After successfully logging in, click Traffic channels, then click New from Template. A new page will appear where you can search for 7SearchPPC. Once located, click the Add button to continue.
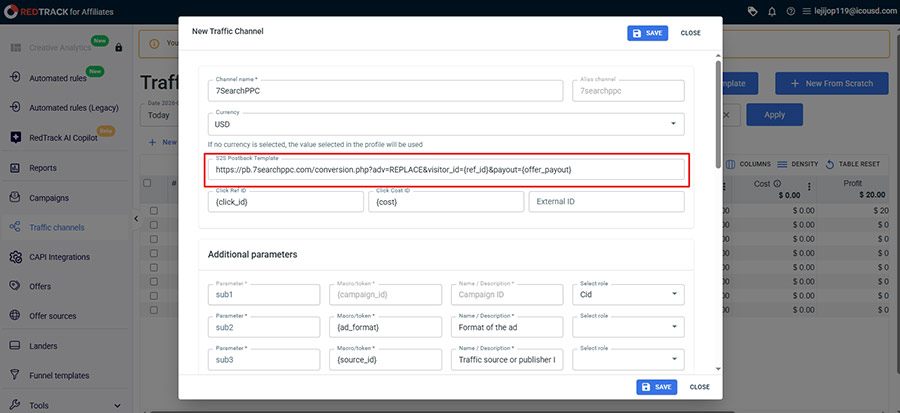
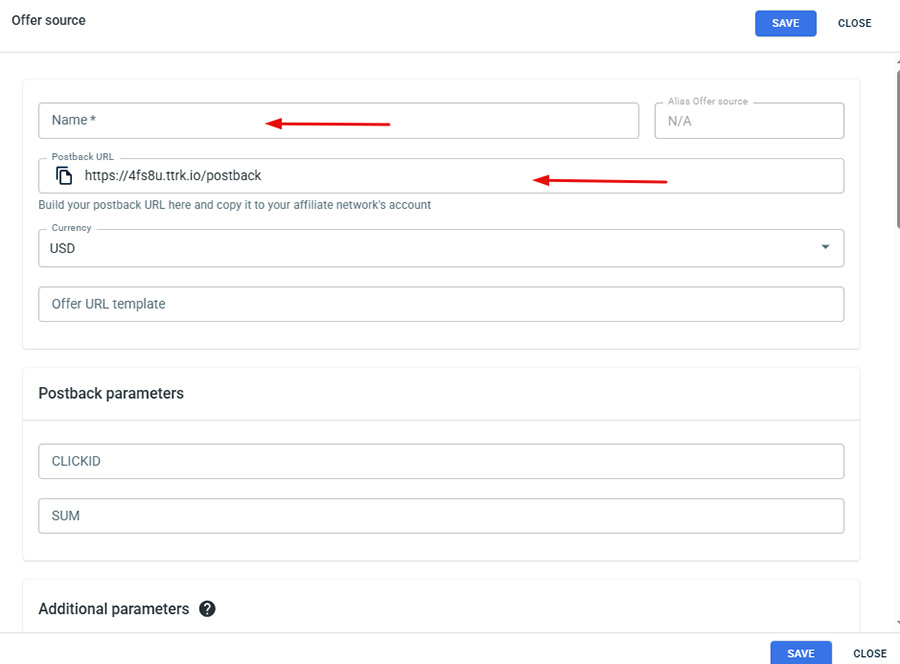
After clicking Add, a pop-up will appear with an S2S postback template that already contains a URL. Remove that URL, then paste the postback URL you copied from 7SearchPPC and click the save button.
After selecting the offer source, choose one of the following options:
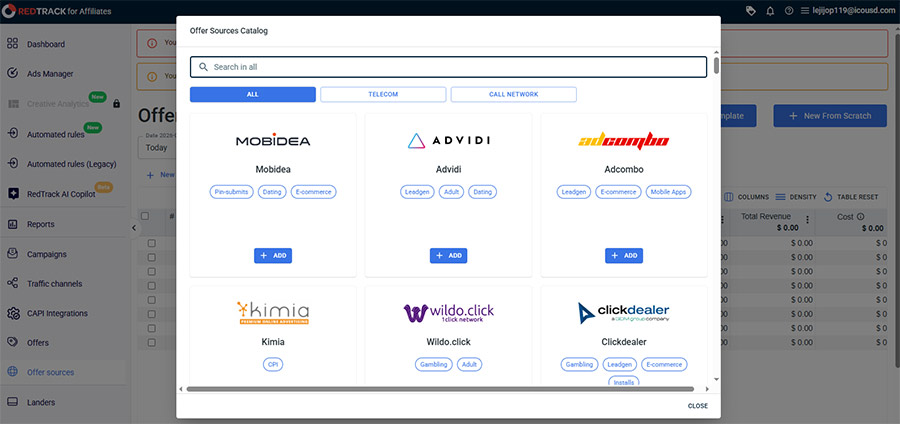
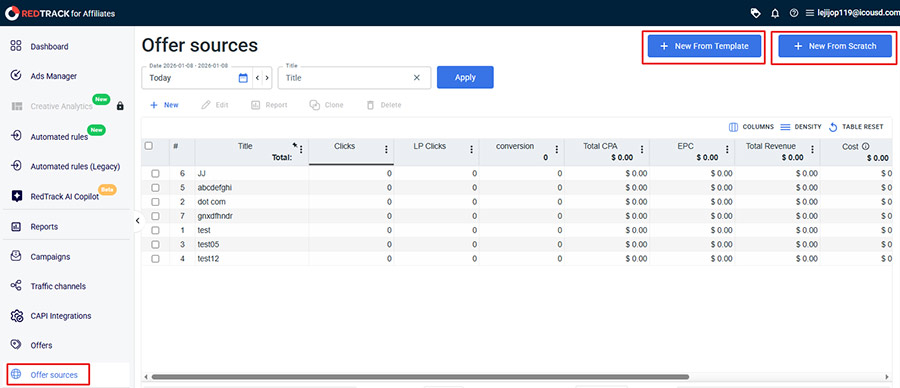
After clicking New from Template, the traffic channels catalog opens. Search for the affiliate network you worked with, then click Add.
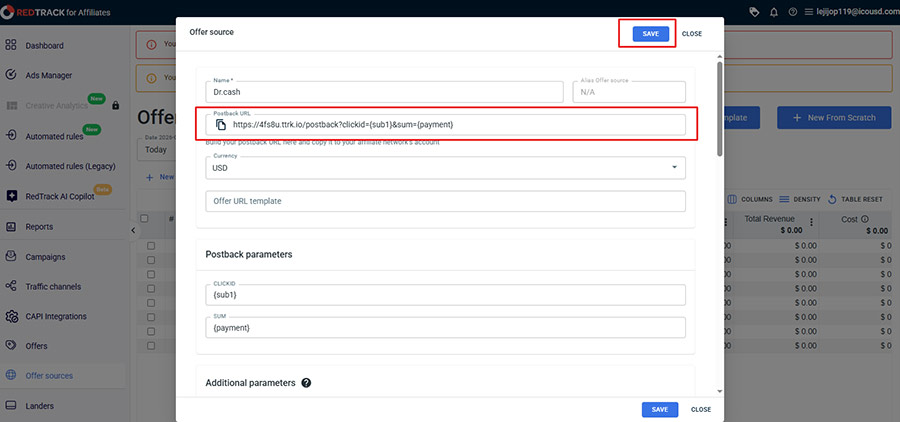
Once you have added the affiliate network, a new pop-up will open. Complete the required details and then save.
If you are a Custom Advertiser, choose New from Scratch. On the page, enter the details, and click Save to complete the setup.
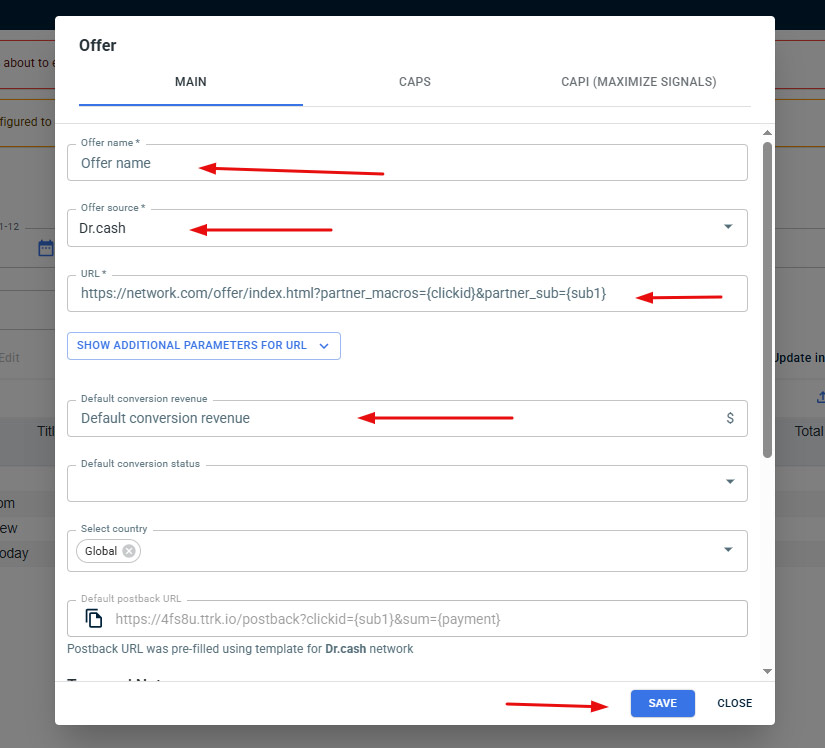
Click the Offer option, then fill in all required fields. Most importantly, in the URL section, paste the Postback URL provided by 7SearchPPC.
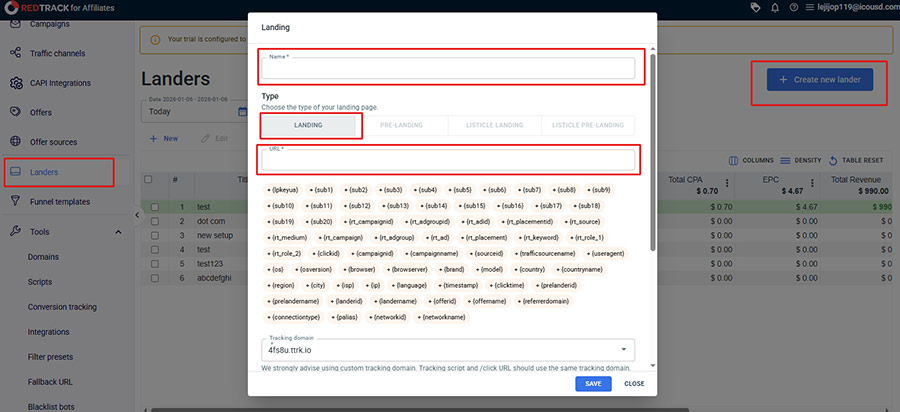
Click on the Lander option if you are an advertiser and not an affiliate. Choose Create New Lander, fill in the required details, especially selecting the necessary Macros, and then save.
Important:
Only select macros that are available in the 7SearchPPC macro list. Do not use unsupported macros. Below are the macros we offer.

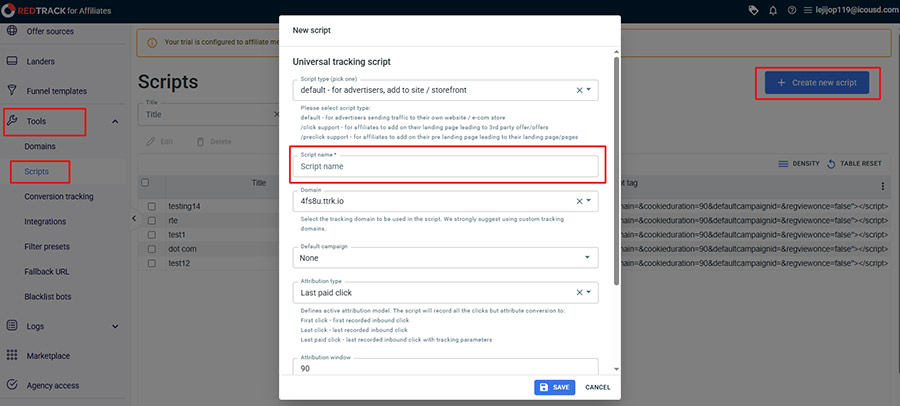
Go to the Script section and click Create New Script. Fill in the details and save it. Then, copy the generated Script URL and paste it into your website’s header.
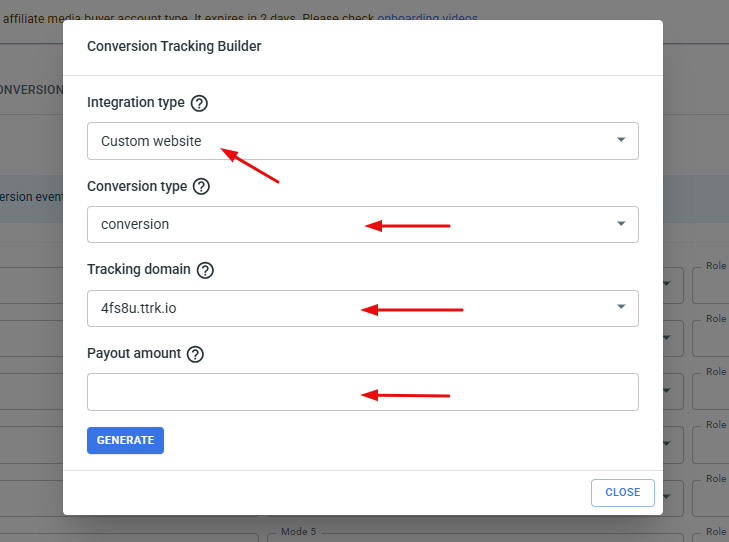
Go to Conversion Tracking and click on Conversion Tracking Builder. Choose your integration type—either affiliate network or custom advertiser—and then complete the required details. After completing these details, click on Generate.
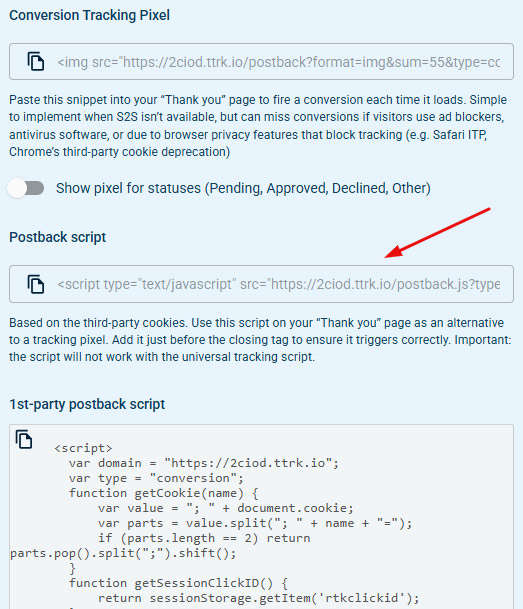
A page will appear displaying the following options:
Finally, copy the Postback Script URL. You need to paste this URL into your website wherever you want to track conversions, whether on a sign-up, purchase, or thank-you page.
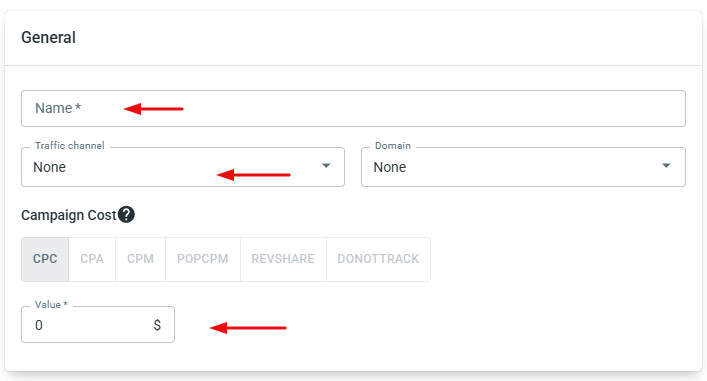
After clicking on the campaign option, you need to create a new campaign and fill in all the details, such as Name, Traffic Channel, Domain, etc.

Once this information is entered, scroll down to the S2S Postback section. Click Add, and your previously saved URL will automatically appear. No further action is needed in this section.
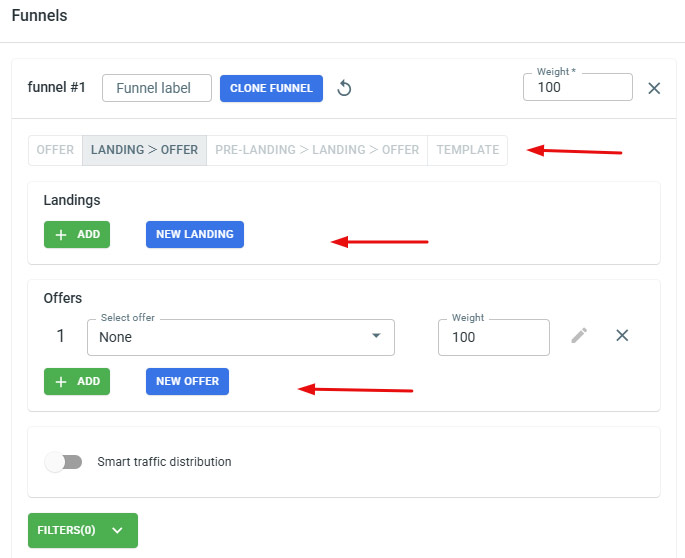
After filling out the S2S URL, go to the Funnel section, select the offer and lander you created, and click Save. If you are an affiliate, all you need to do is select the “Offer” option and add your offer.
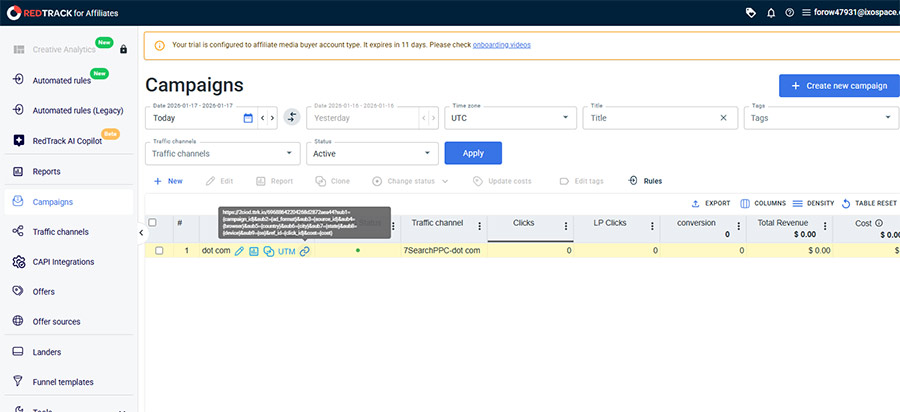
After creating the campaign on the RedTrack tracker, you will see it listed in the Campaign section. Simply copy the campaign URL from here.
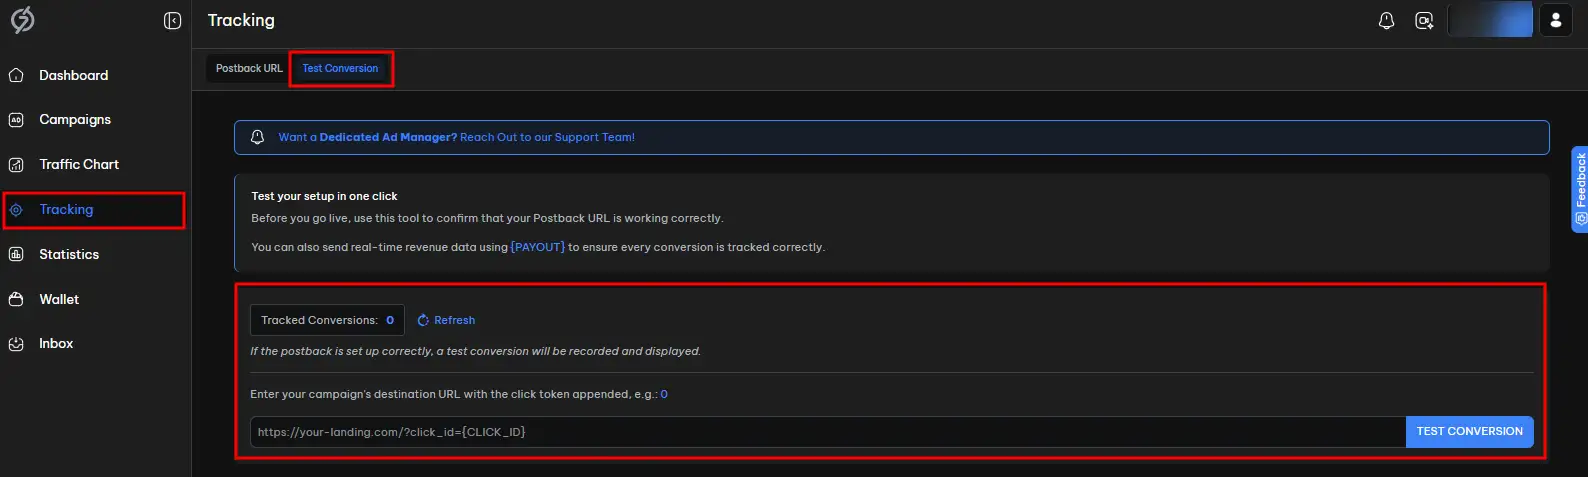
Before finishing, ensure your conversion tracking works. In your 7SearchPPC dashboard, go to Tracking → Conversion Tracking, select Test Conversion, paste your Destination URL, and run the test.

After that, you will be taken to the page where the conversion should occur—complete the action (e.g., submit a form or register). Return to the conversion tracking page; if set up correctly, it will show "Test Conversions Tracked: 1," indicating you have successfully tested and received the correct data.
Similarly, you will see the conversion on the RedTrack dashboard.
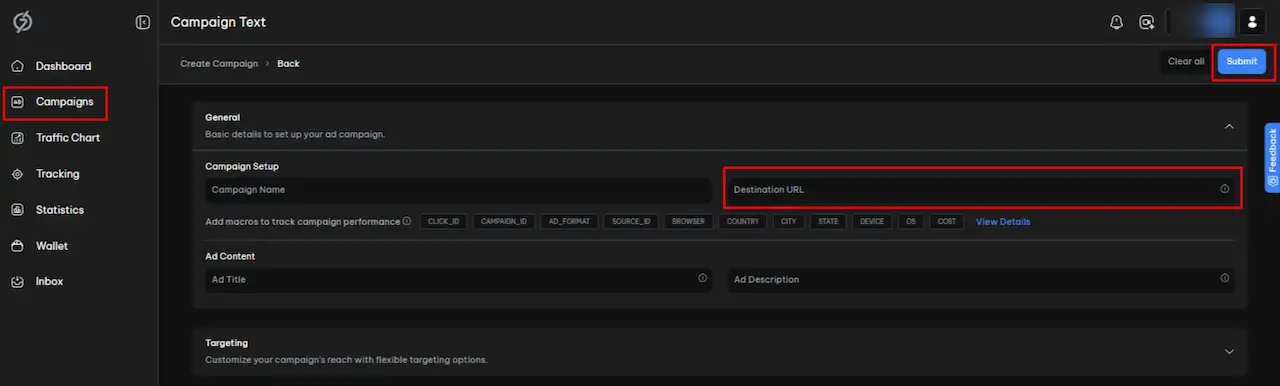
After successfully testing your conversion, proceed to create a campaign on 7SearchPPC. Complete all the required details for your ad campaign as instructed on the platform. Once all required details are filled in, paste the URL you copied from RedTrack into the Destination URL field, then click “Submit” to launch your ad campaign.
There are many advantages advertisers gain after integrating with RedTrack on our platform, as everything becomes easier for them. Let’s take a look at how integration benefits 7SearchPPC advertisers.
 Log in to Manage Your Account
Access your dashboard to manage and optimize ads.
Check your stats and grow your ad revenue.
Start Growing With 7SearchPPCWant to promote your products, services, or offers.
Want to monetize your website, blog, or social media traffic.