If you’re tired of missing conversions, dealing with unreliable tracking, or making decisions based on incomplete data, Postback S2S (Server-to-Server) tracking with Keitaro is exactly what you need.
Here’s a clear, step-by-step guide to help you set up Keitaro postback tracking correctly.
A successful postback integration begins with the right foundation. Make sure you have the following essentials in place before getting started:
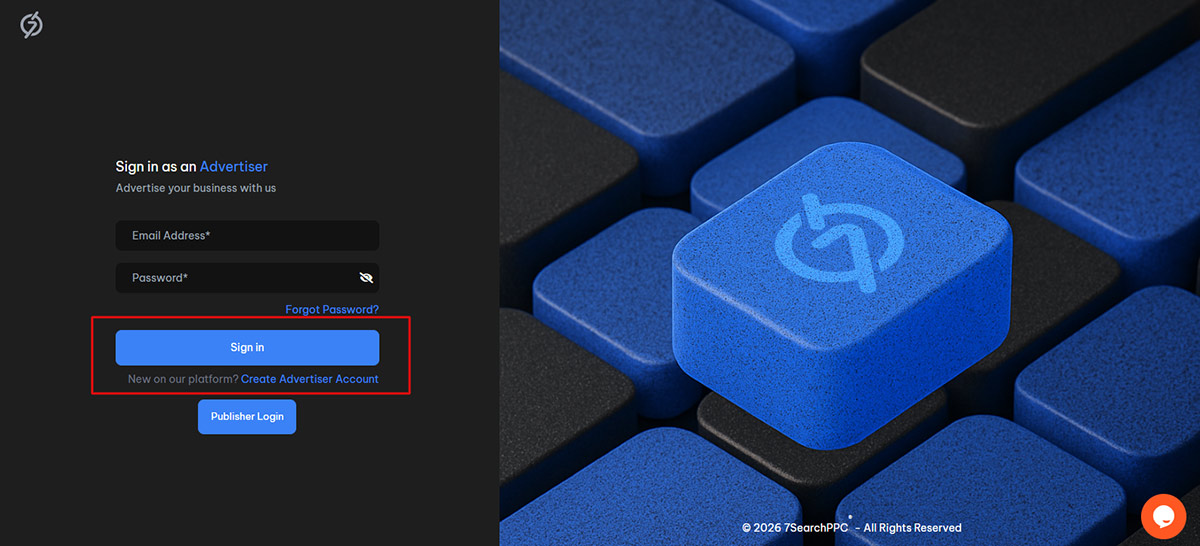
To get started, log in to your 7SearchPPC advertiser account using the steps below:
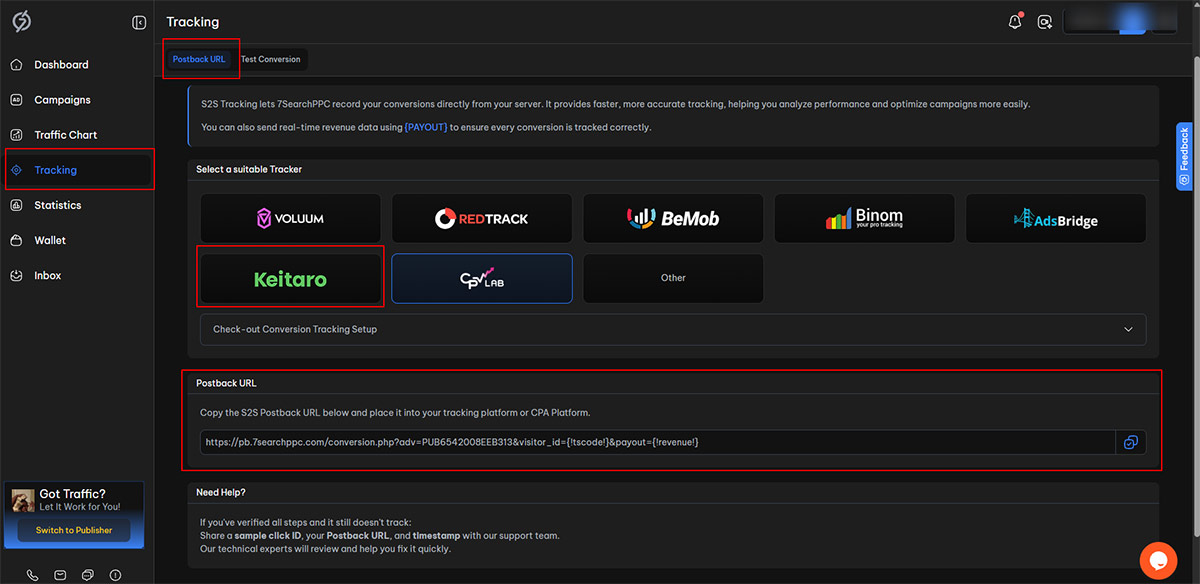
Once you have successfully logged in to the 7SearchPPC advertiser dashboard, follow these steps:
Once you have copied the postback URL from 7SearchPPC, Log In to the Keitaro platform using your credentials.
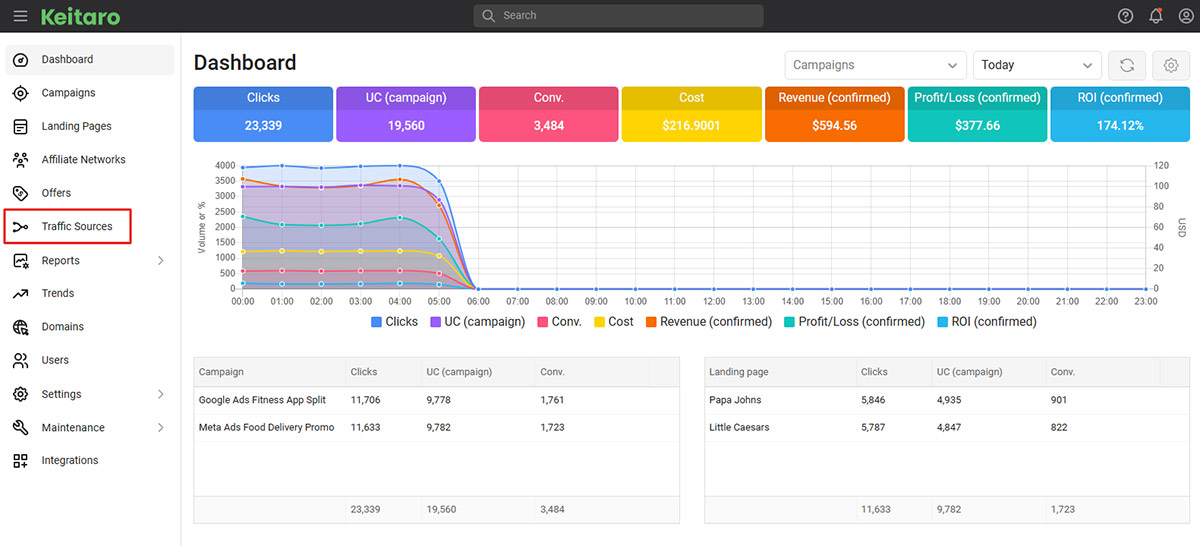
After you log in, click on the Traffic Sources option on the left.
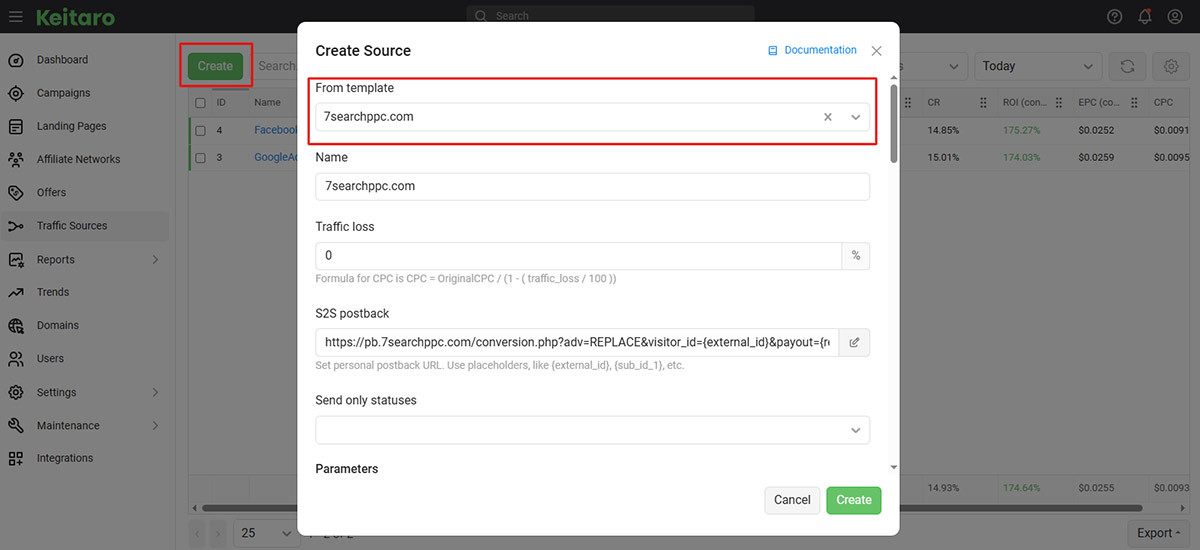
Click on the Traffic Sources option, then select Create. A new page will appear where you need to choose a Template. In the search bar, type 7SearchPPC, select it from the results.
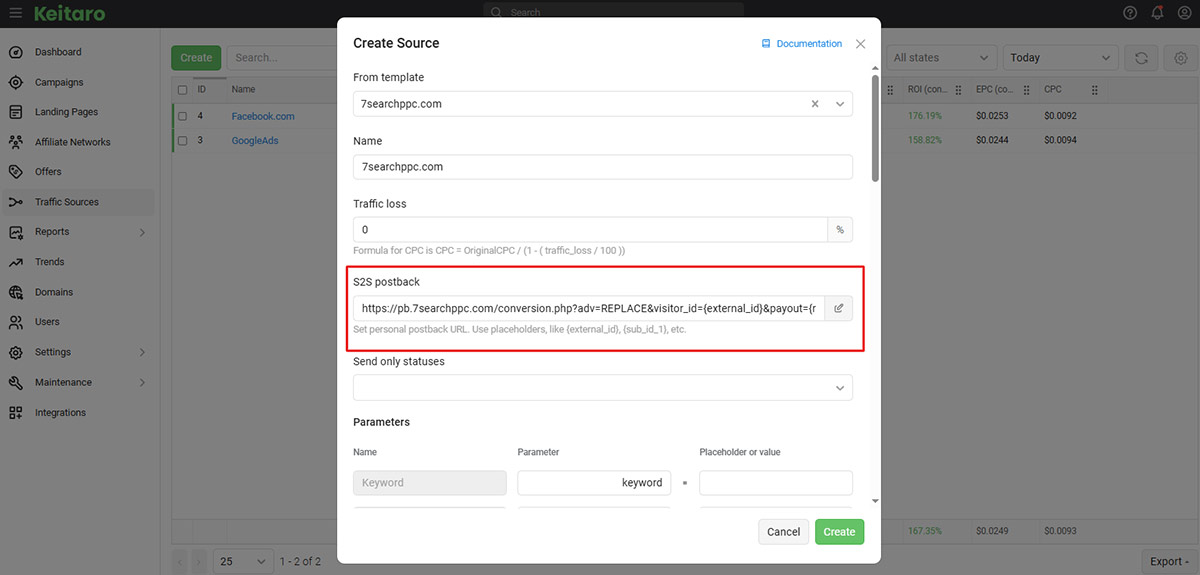
After selecting 7SearchPPC, follow these steps:
For a clear understanding of how to set up traffic sources, refer to the Keitaro Traffic Source documentation.
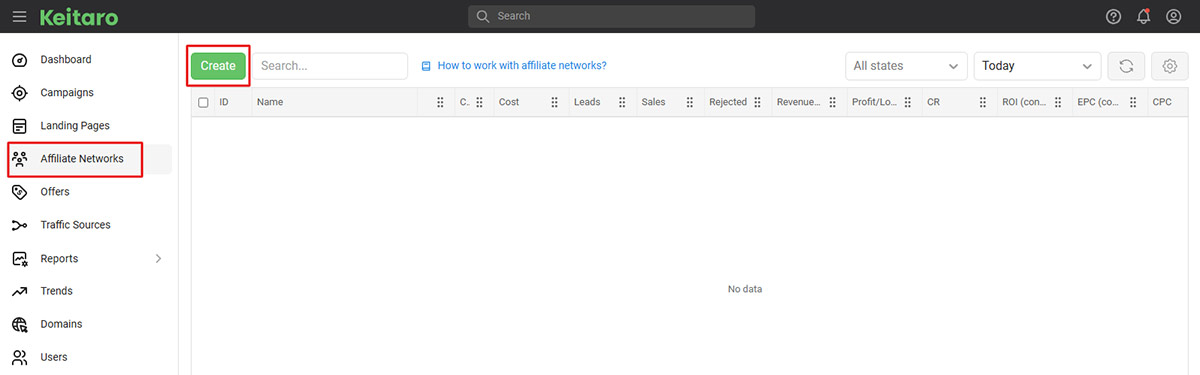
To add your affiliate network, follow the steps below:
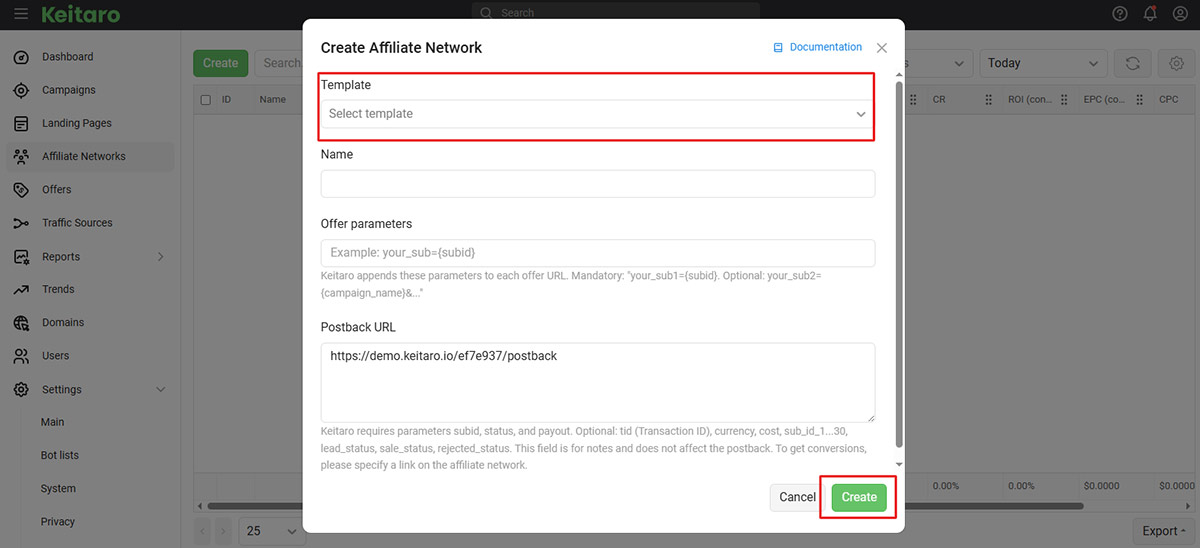
When you click on the Create button, a new page will appear. Follow these steps to complete the setup:
Here’s a guide to help you set up the Affiliate Networks in Keitaro.
If you have a custom website, you can skip the steps above and go directly to creating an Offer.
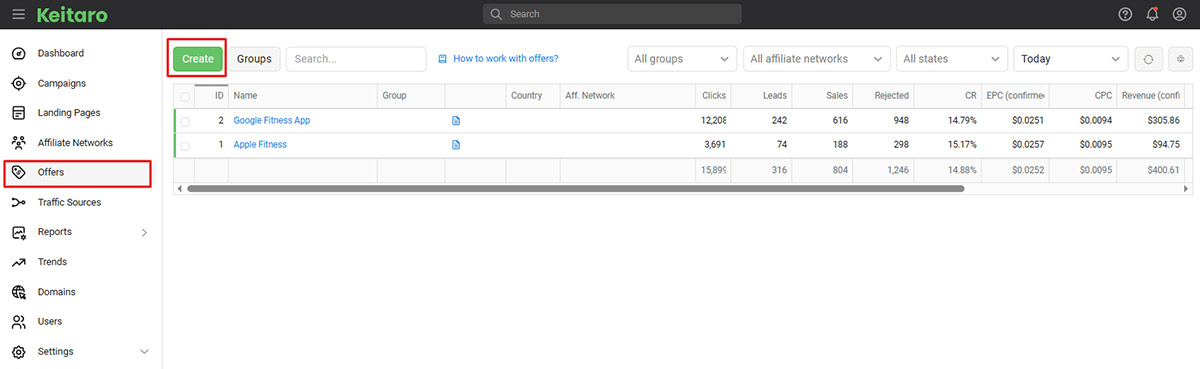
Now it’s time to create an offer. To do this, navigate to the Offers section and click on the Create button.
*Offer setup may differ depending on whether you are operating as a Custom Advertiser or an Affiliate. Below is a clear breakdown of both scenarios:
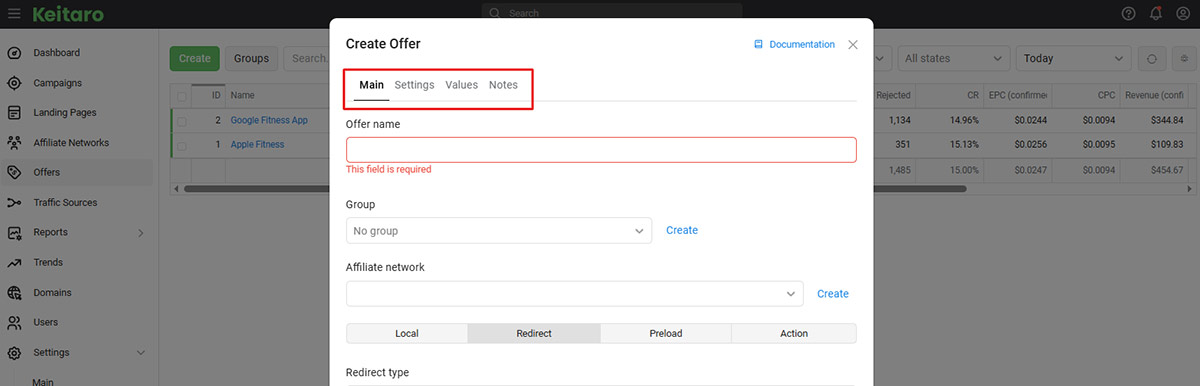
As a custom advertiser, you have four options to fill out, which include:
» Main
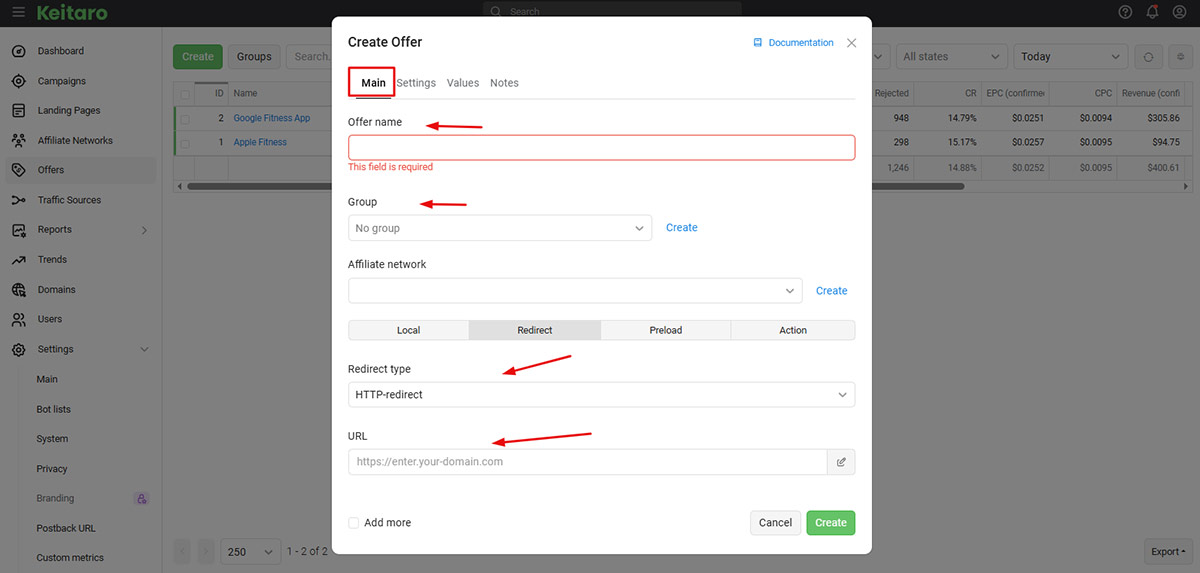
In the Main section, you’ll need to fill in a few key details to set up your offer:
» Settings
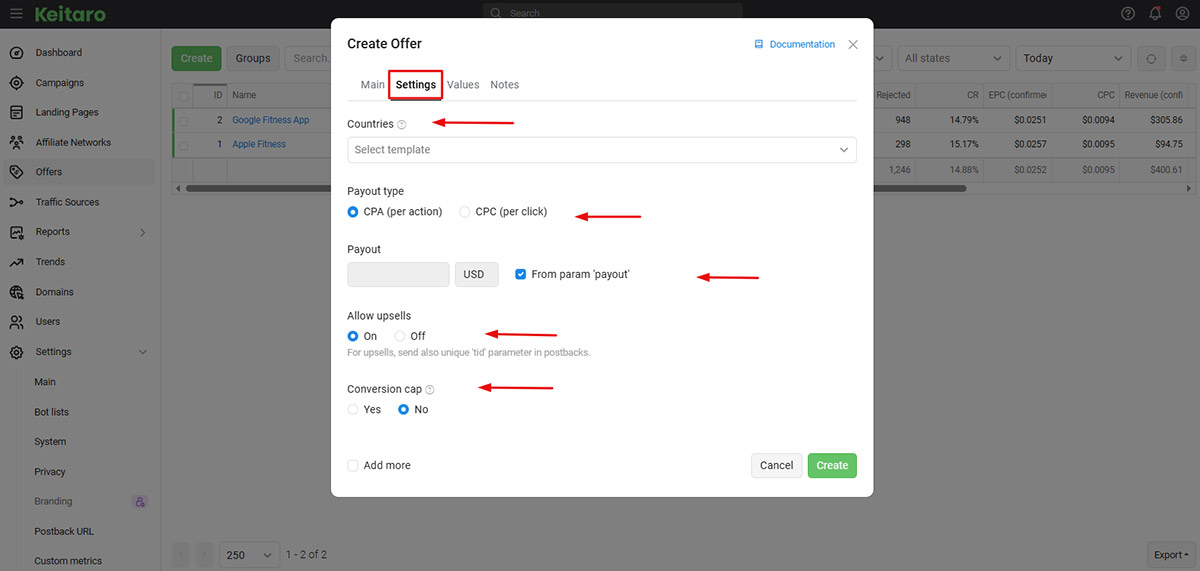
After filling out the Main options, click on Settings and complete the following:
» Values
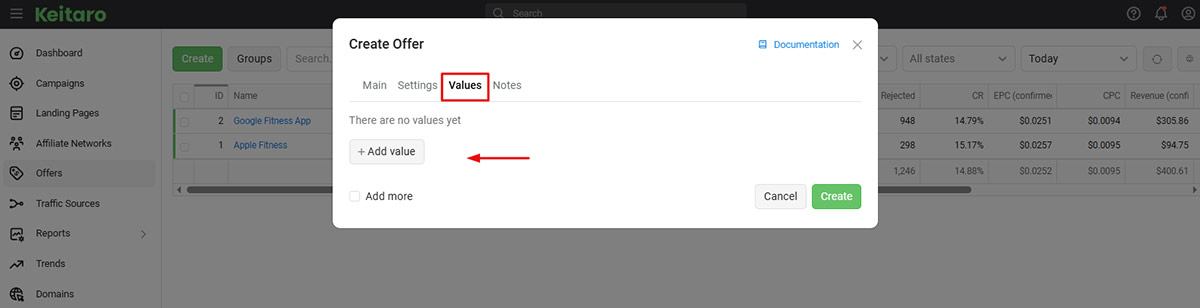
Now move to the Values section, where you have to:
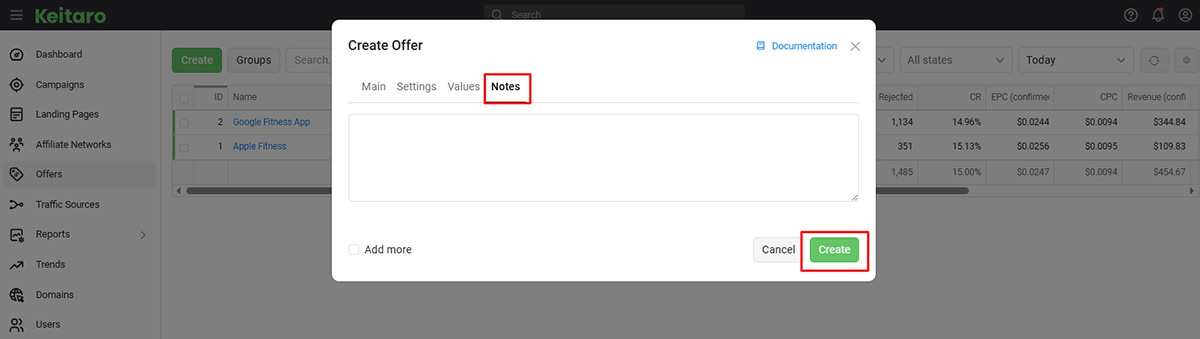
» Notes
Finally, add a note in the Notes section. Once everything is done, simply click the Create button below.

Affiliates are requested to follow the steps below:
For a clear view of how to create the offer, refer to the Keitaro Offers Documentation.
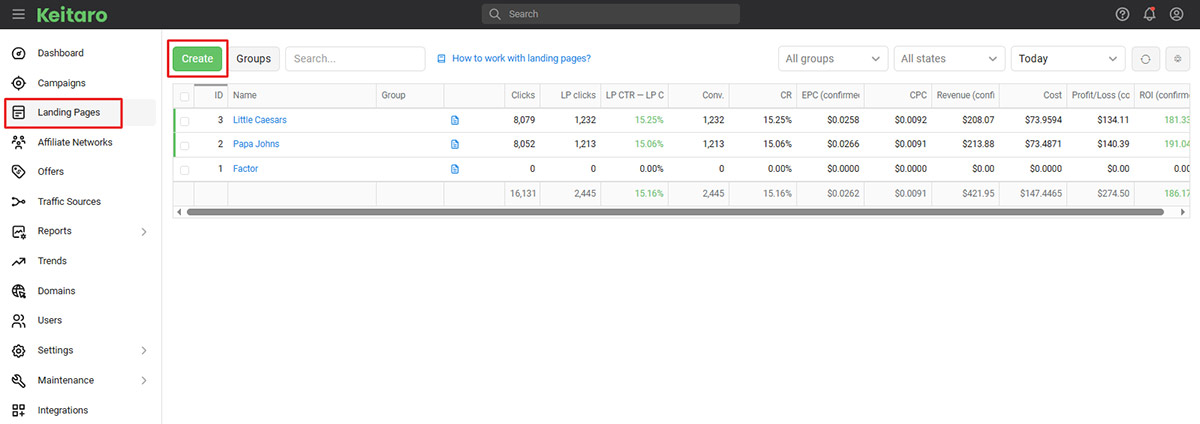
After setting up the offer, navigate to the Landing Pages section on the left-hand side. Click on it, then select Create.
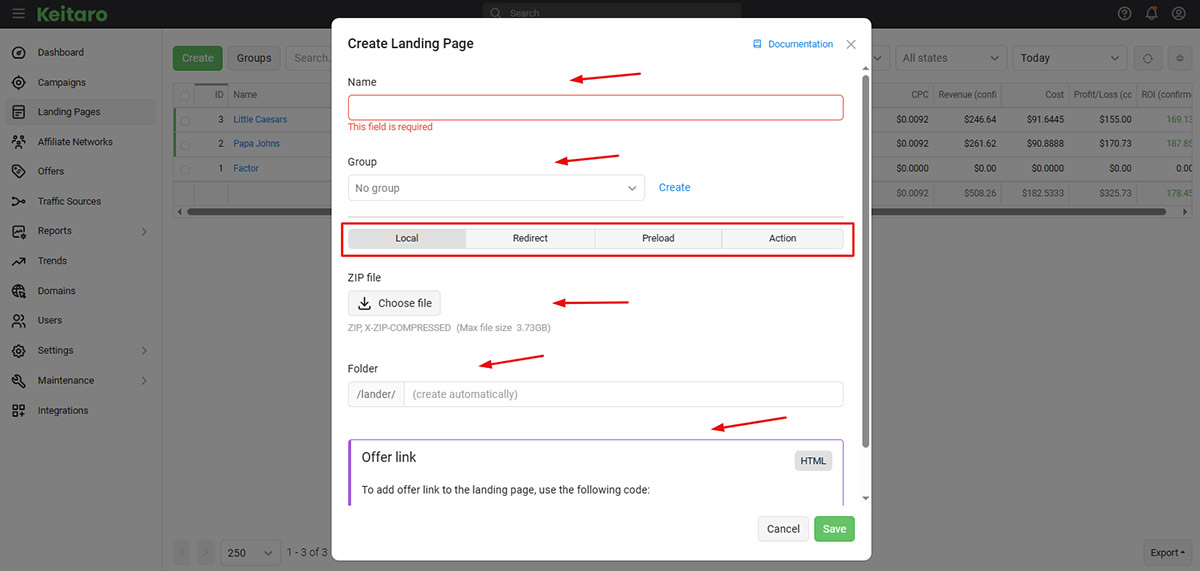
A new page will appear where you have to fill out the following details:
Once completed, fill out the additional details below:
Open each option and provide the required information. Ensure all fields are completed correctly, then click Save.
For more information, refer to the Keitaro Landing Page Documentation, which explains how to create one.
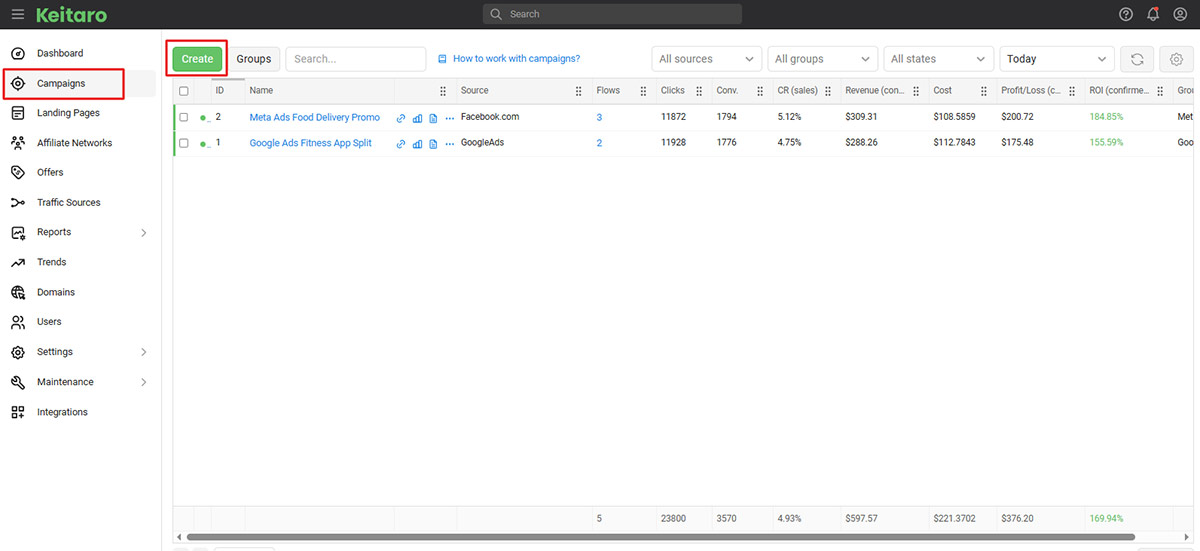
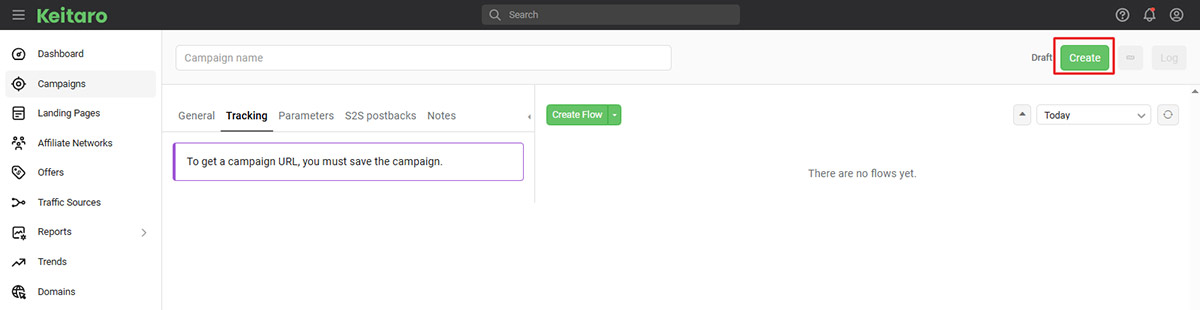
Now it’s time for you to create a campaign. Go to the Campaigns section on the left-hand menu and click on it. Then select Create and follow the steps provided to set up your campaign.
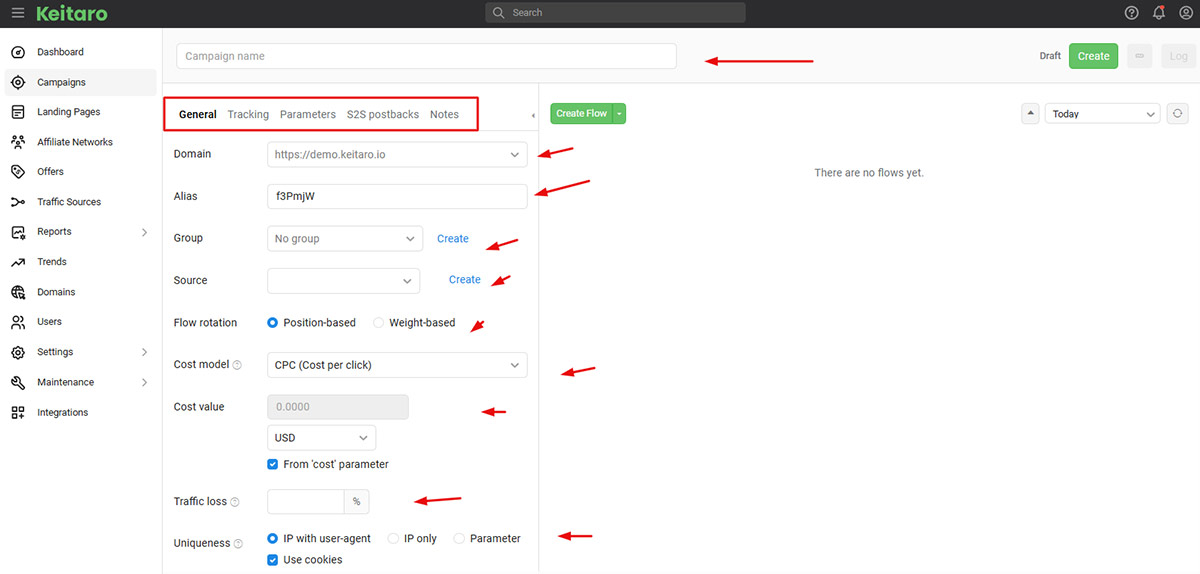
Once you click Create, a page will open where you need to enter the Campaign Name and fill out the required options in the following sections.
Take your time to go through each section carefully. Every tab contains specific fields designed to capture important details, so make sure to fill in all the required information accurately.
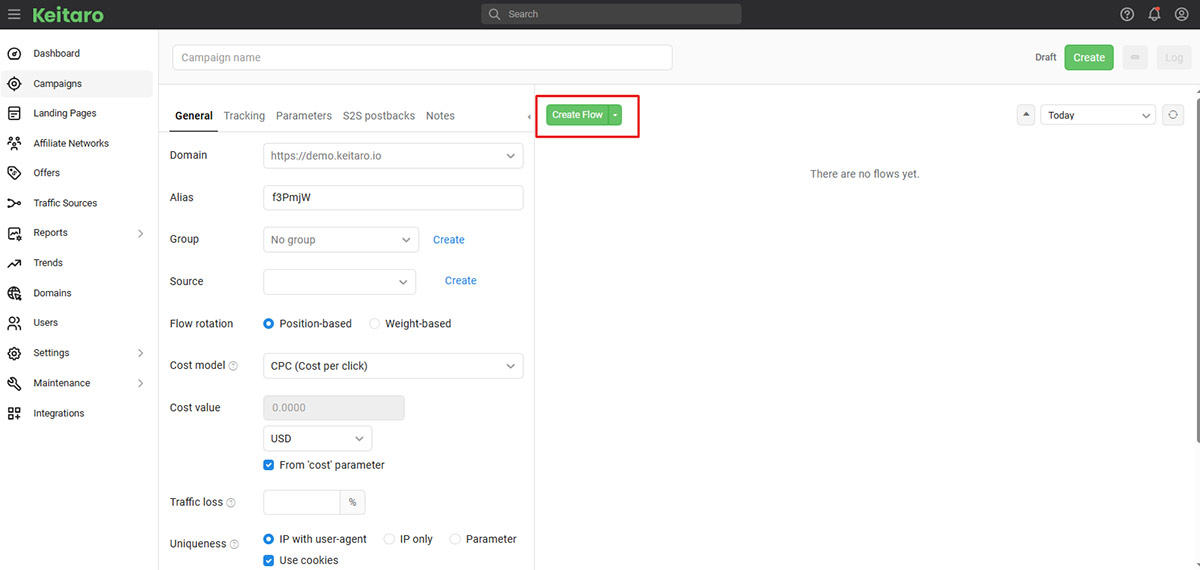
Click on a Create Flow button. Once you click, you’ll come across several important sections:
Let’s break it down step by step and start with the first section:
» Main
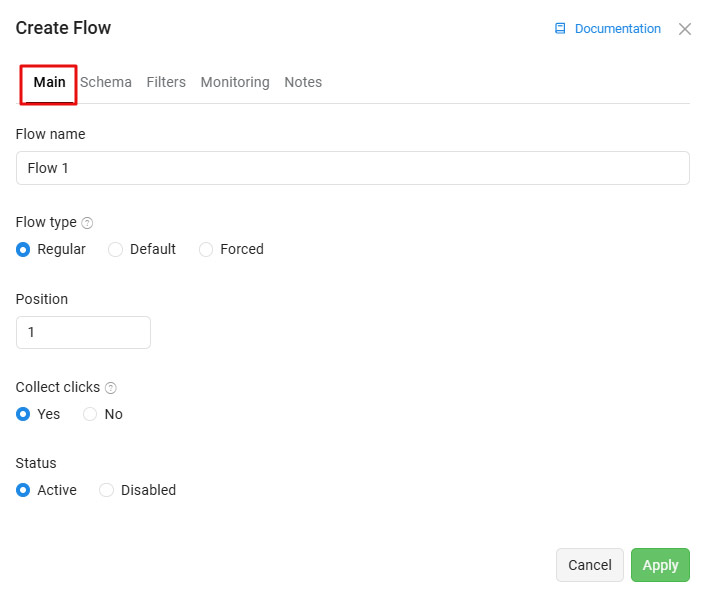
In the Main section, you’ll define the core details of your flow, as it includes:
» Schema

Next, move on to the Schema section. Here, you’ll come across sections like:
Each of these sections comes with its own set of fields and configurations. Take a moment to explore what each option offers. As you go through them, make sure to carefully fill in all relevant details.
Once all sections are properly filled, you can move on to the next step.
» Filters
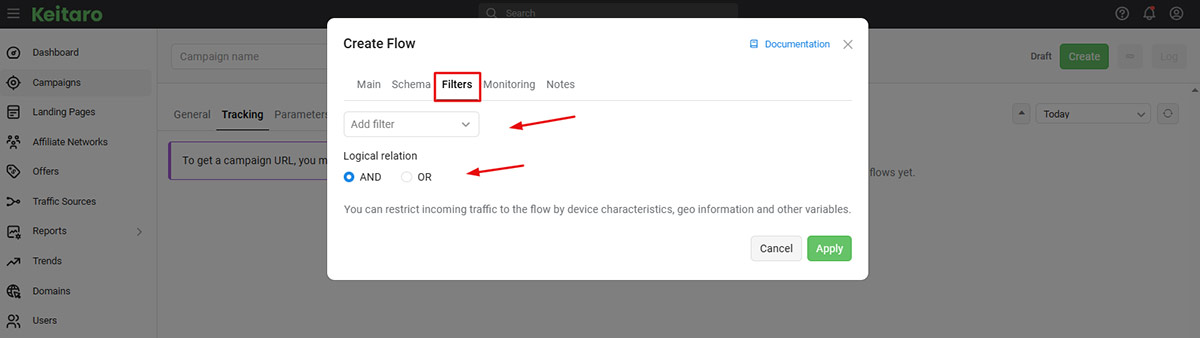
Now it’s time to fine-tune your flow using the Filters section. Here, you’ll find options like:
Select as per your preference and proceed to the next section.
» Monitoring
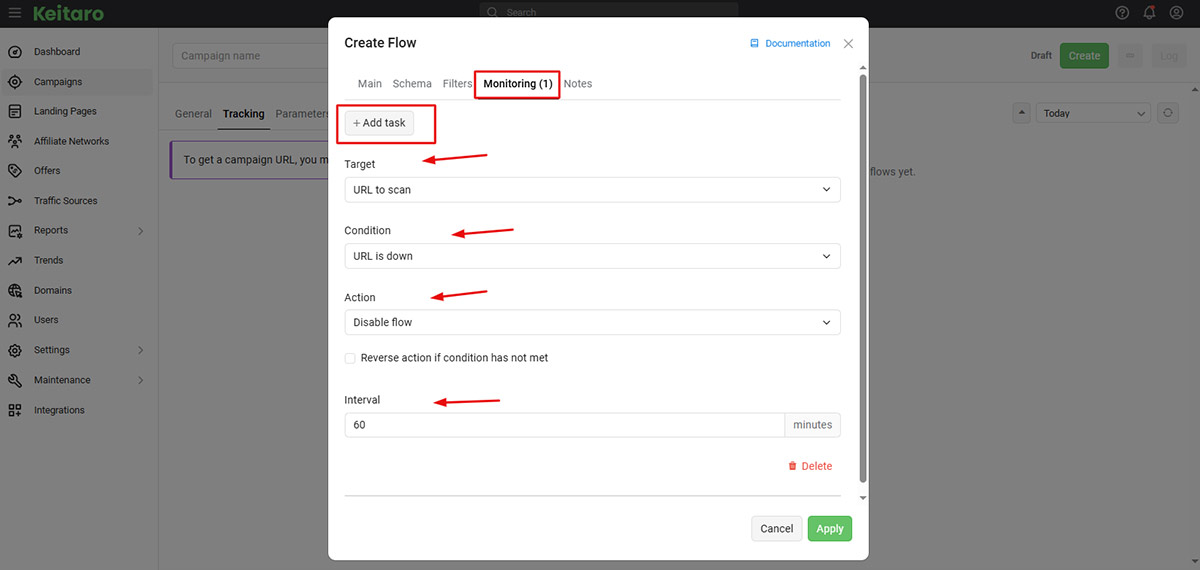
Next, go to the Monitoring section and click Add Task. Take your time to carefully fill out the necessary information.
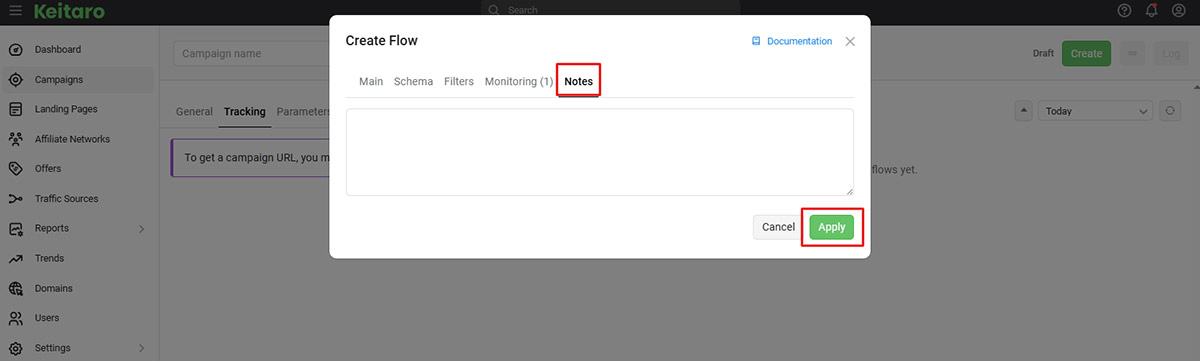
» Notes
Finally, head to the Notes section. Once you’ve filled it out, simply click Apply to save your setup.
Click the Create button in the top-right corner to finalize the campaign creation process.
For further details on creating the campaign, see the Keitaro Documentation on Campaign Setup.

After successfully creating the campaign, you just need to copy the Campaign URL from the Keitaro dashboard.
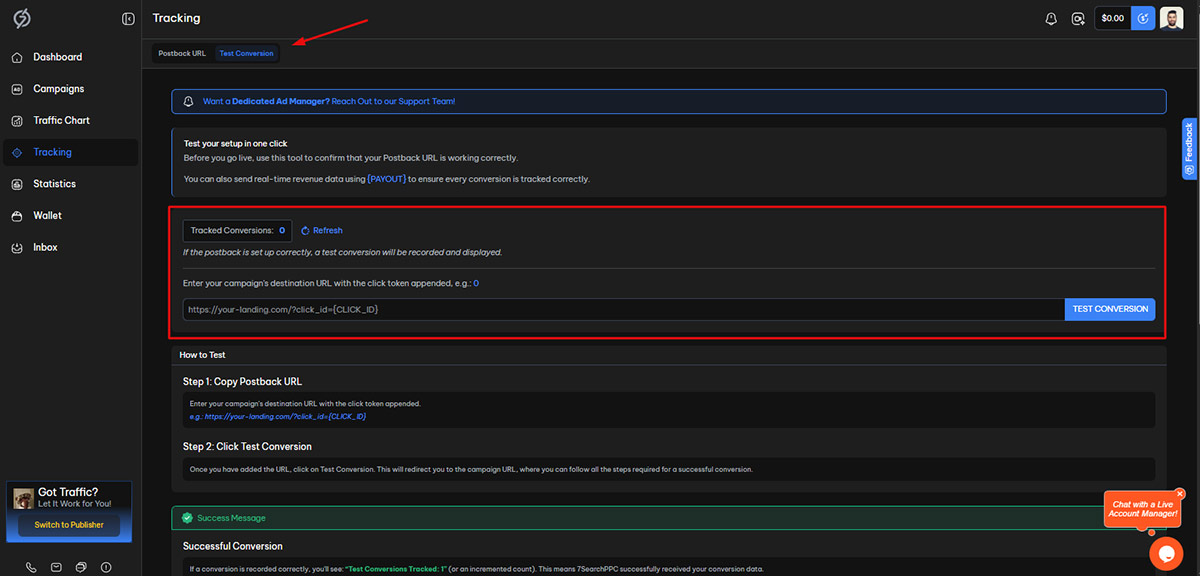
It's crucial for you to make sure that your conversion tracking is working properly. To do this, follow these steps:
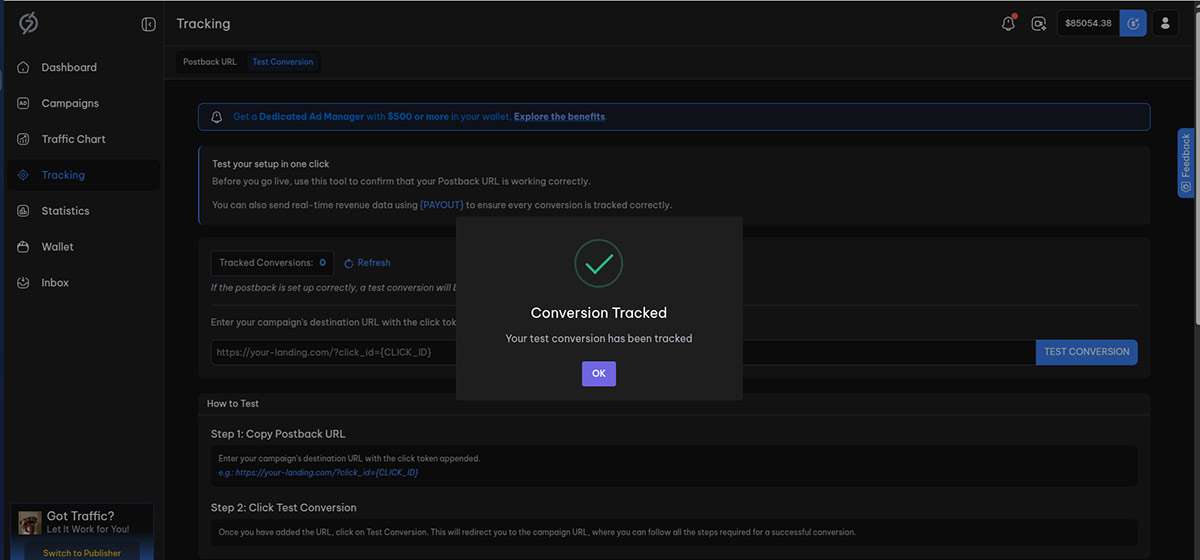
Once you run the test:
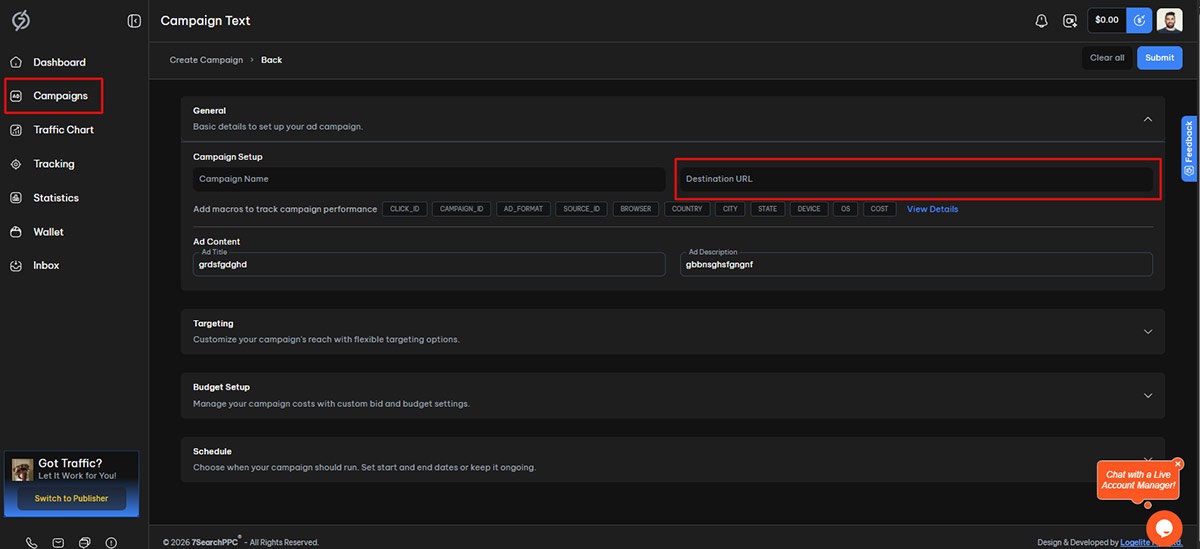
Once the conversion has been successfully tracked, don’t stop there. Proceed to create your ad campaign on 7SearchPPC.
For further clarity on the functionality of Keitaro postback tracking, please refer to the official postback documentation.
 Log in to Manage Your Account
Access your dashboard to manage and optimize ads.
Check your stats and grow your ad revenue.
Start Growing With 7SearchPPCWant to promote your products, services, or offers.
Want to monetize your website, blog, or social media traffic.