Step-by-Step Documentation to Integrate 7SearchPPC With CPV One to Initiate S2S Postback Tracking
By integrating 7SearchPPC with CPV One (cloud-based solution), you can track every KPI that matters for your campaigns in real-time to test, optimize, and scale based on precise data. Use this step-by-step guide to seamlessly integrate 7SearchPPC with CPV One and allow S2S postback conversion tracking.
* The same documentation can also be used to integrate 7SearchPPC with CPV Lab (self-hosted solution), since both tracker versions offer the same interface and features.
Step 1: Things You Need to Have for Postback Integration!
Before you initiate the integration process, ensure you have the following things in place.
- An active CPV One Account. If not, sign up now.
- An active 7SearchPPC Advertiser Account. If not, then create your account.
- Products, Services, and Offers to promote.
- An active Affiliate Account. (*If you’re an affiliate marketer.)
- A dedicated Landing Page. (*If you need one.)
Step 2: Log In to Your 7SearchPPC Advertiser Account
Follow these steps to access your 7SearchPPC advertiser dashboard.
- Navigate to the official website in your browser: www.7searchppc.com
- Click the Log In button located at the top-right corner of the homepage.
- A pop-up will appear on your screen. Here, you have to select the As an Advertiser box and click on the Continue button.
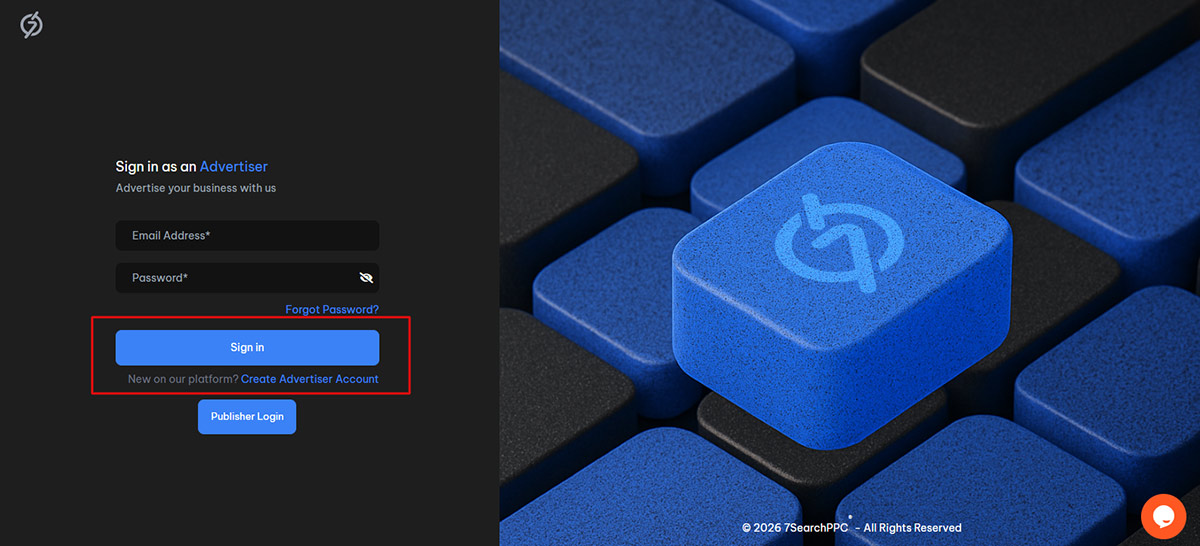
- Now, Sign In with your credentials to access your advertiser dashboard.
Step 3: Copy the S2S Postback URL From Your 7SearchPPC Advertiser Account
Once you’ve successfully logged in to your advertiser account, select CPV Lab as your conversion tracking tool, using the following steps.
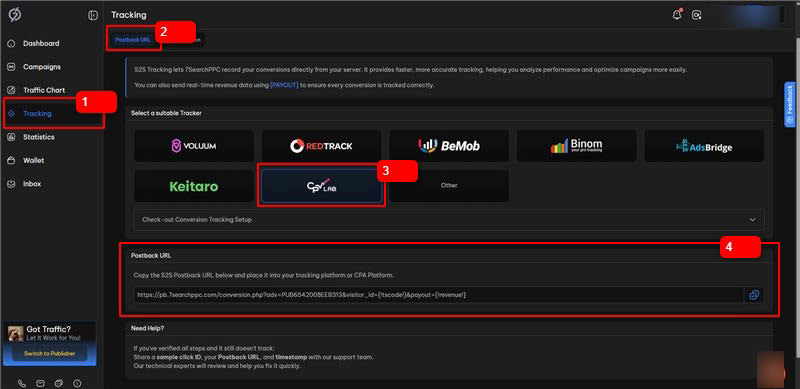
- Select Tracking from the sidebar menu of the 7SearchPPC dashboard.
- Choose CPV Lab from the list of available trackers.
- Scroll down a little to access and copy the Postback URL.
* The Postback URL is required when setting up 7SearchPPC as your traffic source in CPV One.
Step 4: Proceed to Integrate 7SearchPPC as Your Traffic Source in CPV One
Log in to your CPV One account using the unique link sent to your registered email address along with your credentials, and follow the steps to set 7SearchPPC as your Traffic Source.
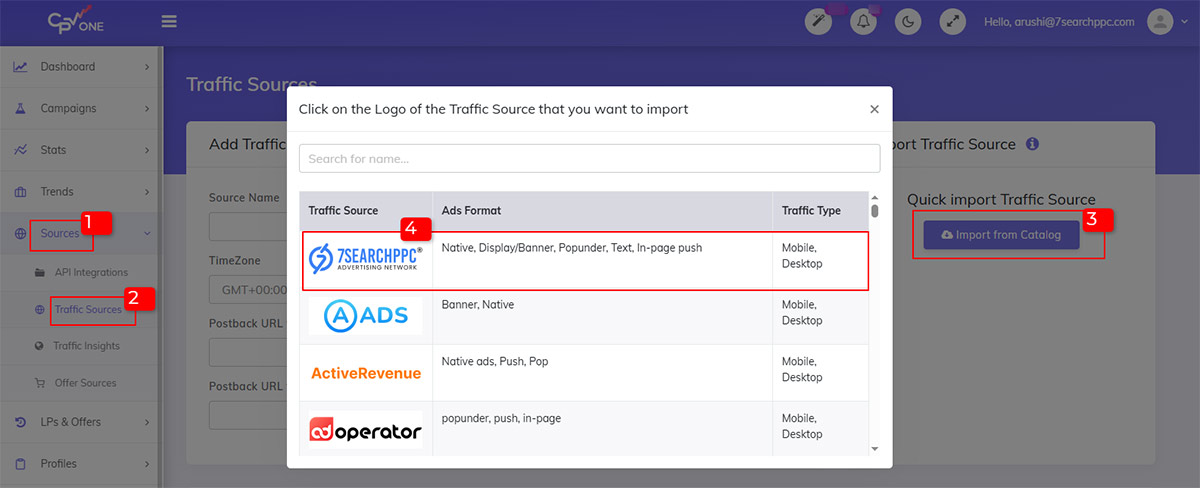
- Select Sources, and then Traffic Sources from the sidebar panel.
- Click on the Import from Catalog button.
- A pop-up will appear on your screen. You can either type 7SearchPPC into the search bar or select it from the dropdown list to set it as your desired traffic source.
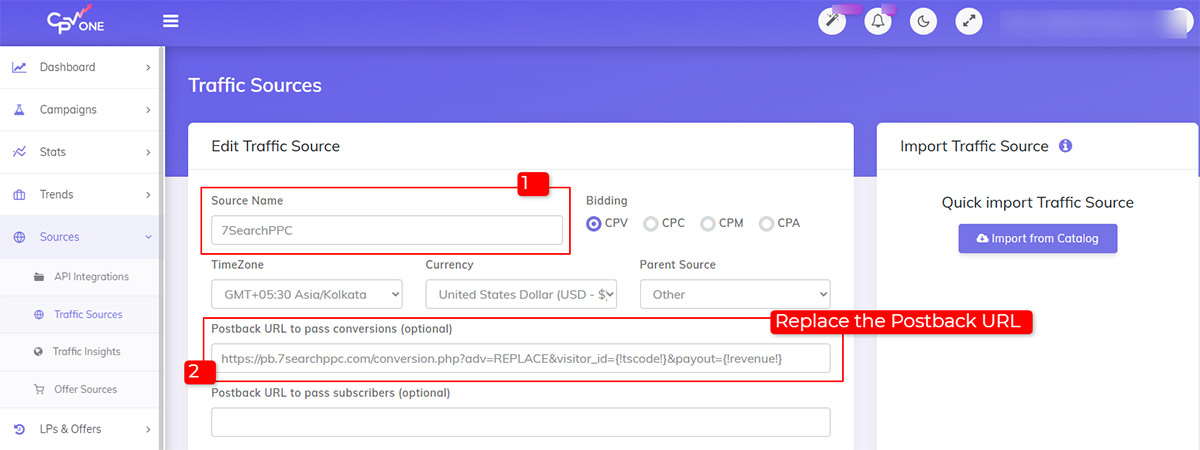
- Replace the Postback URL with the one you have copied from the 7SearchPPC advertiser account.
- Review Source Name, TimeZone, Currency, Bidding, integrated Tokens, etc., and then click the Save button.
Step 5: Integrate Affiliate Network, Add Offers, and Set Up Landing Page
Follow these steps to smoothly integrate your affiliate network, add offers, and create a landing page in CPV One.
5.1: Integrate Your Affiliate Network
If you’re an affiliate marketer, follow these steps to integrate your offer source.
- Select Sources, then navigate to Offer Sources from the sidebar menu.
- Add your desired Offer Source using the Import from Catalog option. When the pop-up appears, either type or select the offer source directly from the dropdown list.
- Copy the Postback URL and paste it into your affiliate network to allow conversion tracking.
- Review, and then click the Save button.
* The SubID token in Offer Sources is mandatory, as it helps to assign the conversion attribute to the right source. The parameter values are the tokens provided by your affiliate network.
Refer to the Offer Sources documentation for a detailed walkthrough.
5.2: Add Your Offers
Offers can be added in CPV One using the following steps:
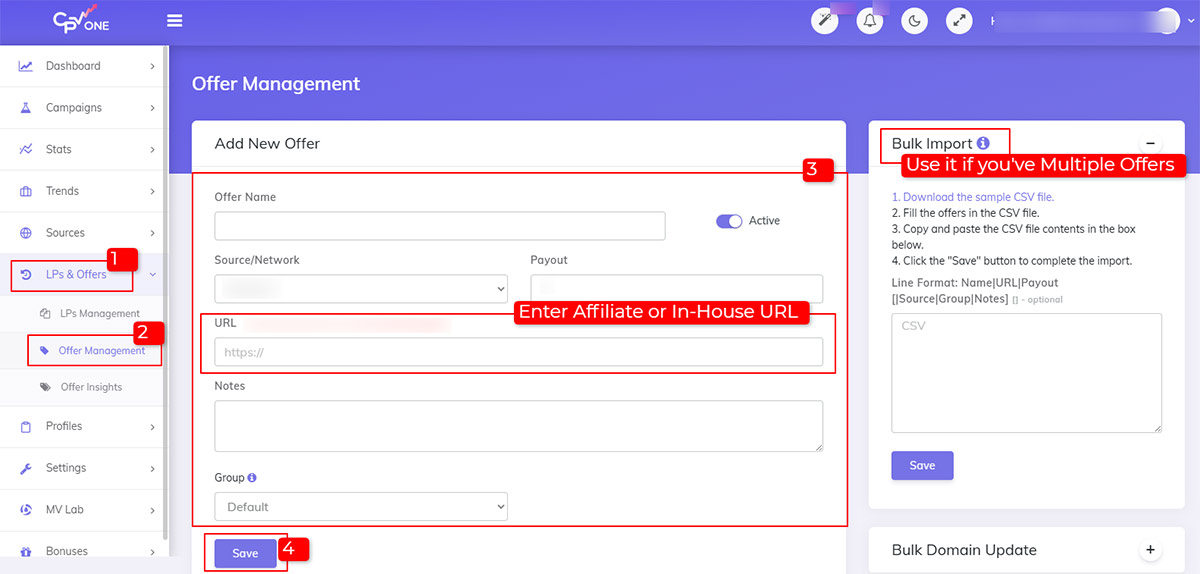
- Click LPs & Offers, and then Offer Management from the sidebar menu.
- Enter the Necessary Details, including the Offer Name, Source, Status, URL, Payout, Notes, and Group.
- Review the offer details carefully, then click the Save button.
* In the Source field, you can select either an affiliate or an in-house offer. You can also use the Bulk Import feature to upload multiple offers via a CSV file.
For a detailed walkthrough on creating and managing offers, refer to the CPV One documentation.
5.3: Set Up Your Landing Page
After adding your offers, proceed to set up the landing page. Follow the steps below to complete the process.
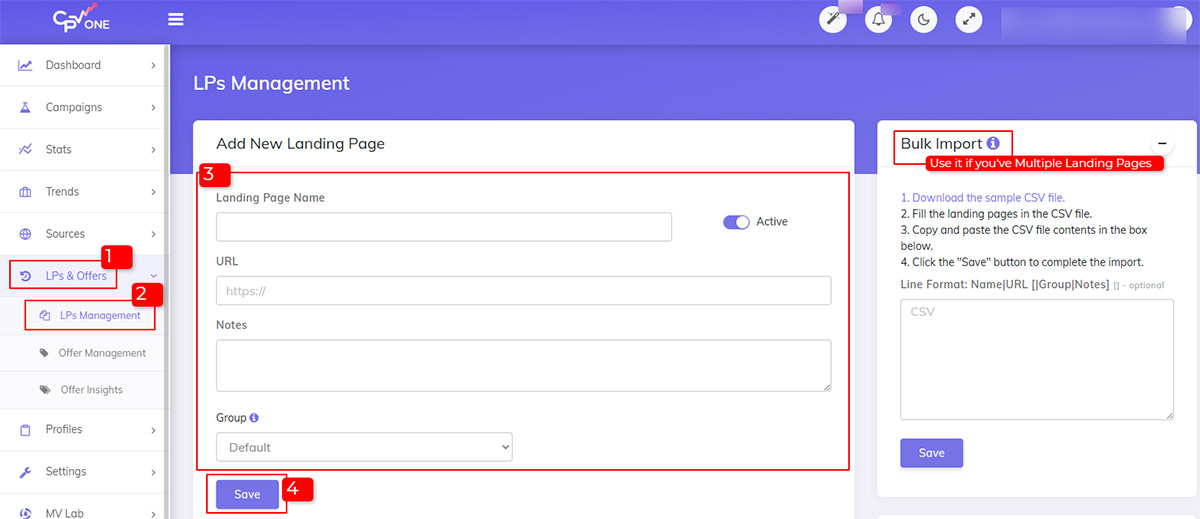
- Navigate to LPs and Offers, and then LPs Management from the sidebar panel.
- Add all Necessary Details, including the Landing Page Name, Status, URL, Notes, and Group.
- Now, click on the Save button.
* The Bulk Import feature lets you quickly add multiple landing pages at once to streamline your campaign setup process. Enter the required information for each landing page in the CSV file. Make sure to include required fields, such as the Landing Page Name and URL.
For more details, refer to the CPV One user guide for setting up landing pages.
Step 6: Create Your Campaign on CPV One
CPV One offers two ways to create ad campaigns. That is:
- Quick Campaign Setup: A simple and straightforward process to set up campaigns within minutes.
- Add New Campaign: A more comprehensive setup experience with advanced settings, tracking options, and detailed configurations for landing pages and offers.
The method you choose to create campaigns depends on your specific needs and experience level. In this guide, we’ll show you how to create a campaign in CPV One using the Quick Campaign Setup feature.
6.1: Campaign Settings
Fill the general campaign setting.
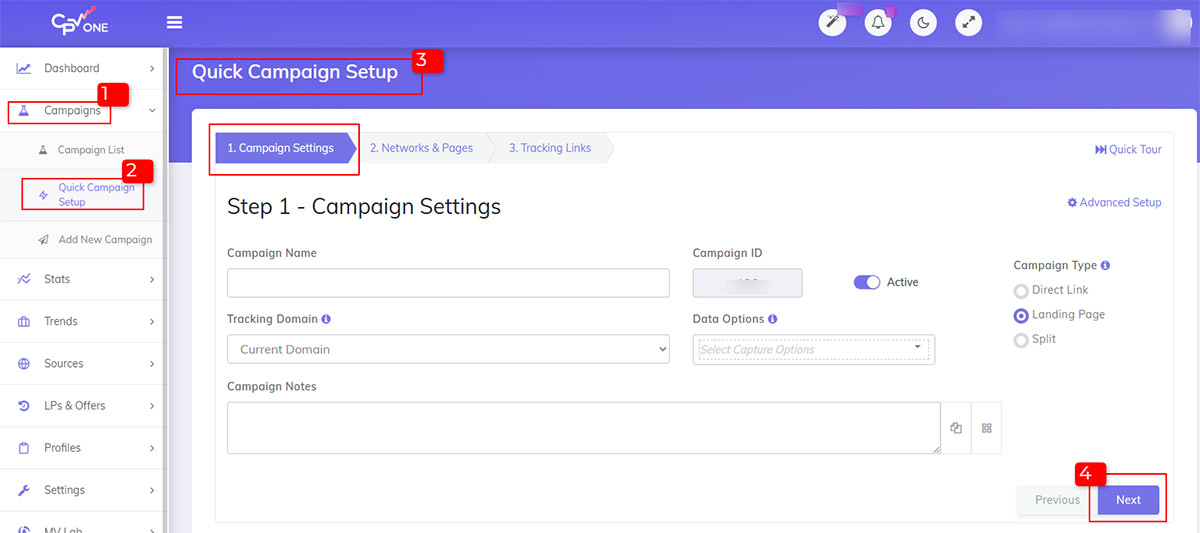
- Go to Campaigns and select Quick Campaign Setup from the side panel.
- Enter all the General Campaign Settings, including Campaign Name, Tracking Domain, Campaign Type, etc and then click on the Next button.
* Enable the Direct Link option when you want to redirect traffic directly to the offer page, and select the Split option when you want to create two or more variations of a landing page for A/B Testing.
6.2: Networks and Pages
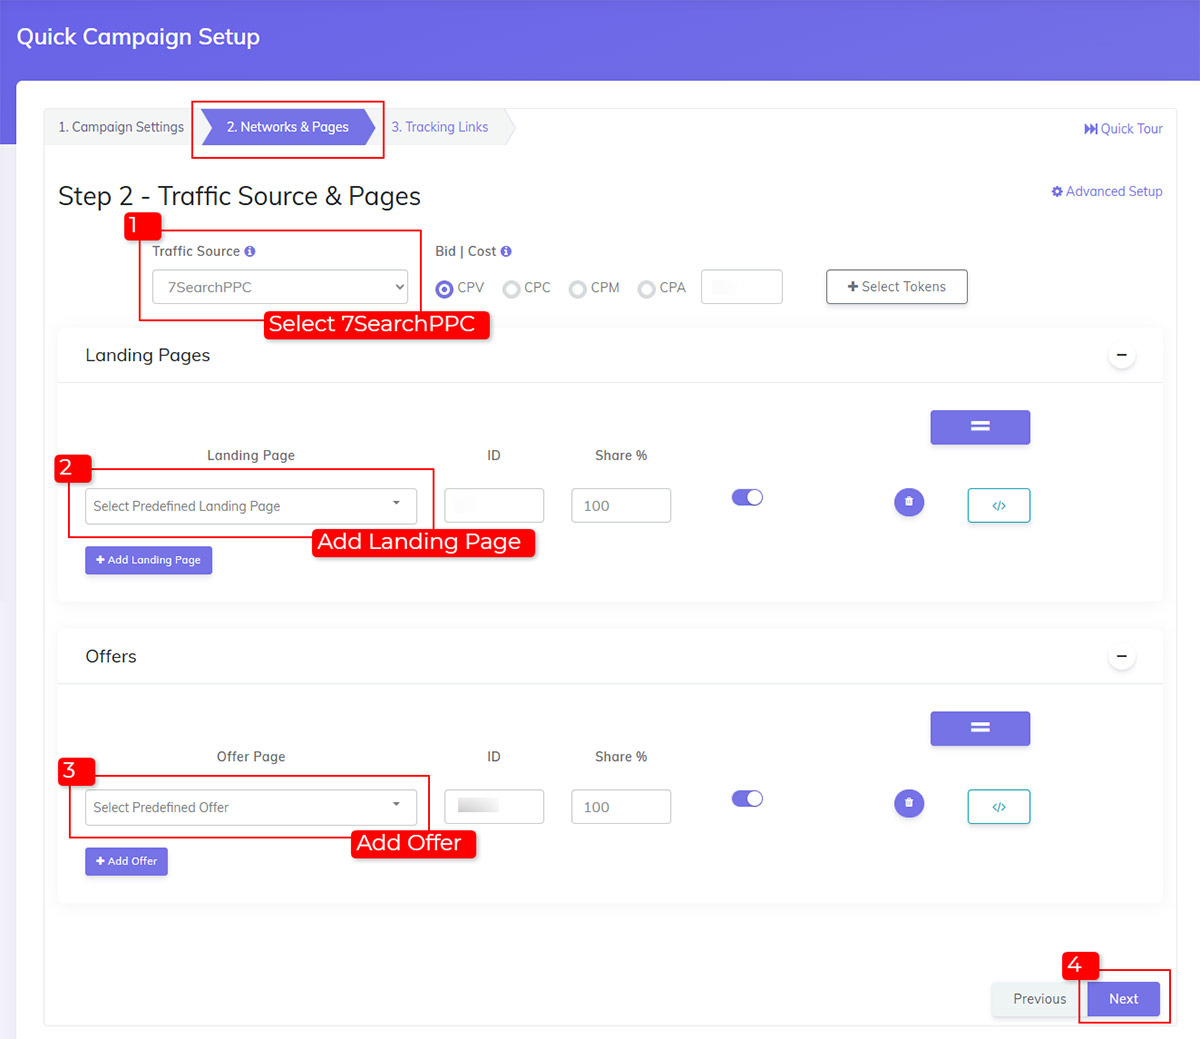
Set traffic source, landing page, and offers using the following steps.
- Select 7SearchPPC as your Traffic Source from the available list of sources.
- Adjust Bid & Cost.
- Select your Predefined Landing Page and Offer.
- Click the Advanced Setup option located at the top-right corner of the screen to set additional tracking settings for advanced performance analysis; otherwise, click the Next button.
*Percentage share for the landing pages and offers needs to be 100%
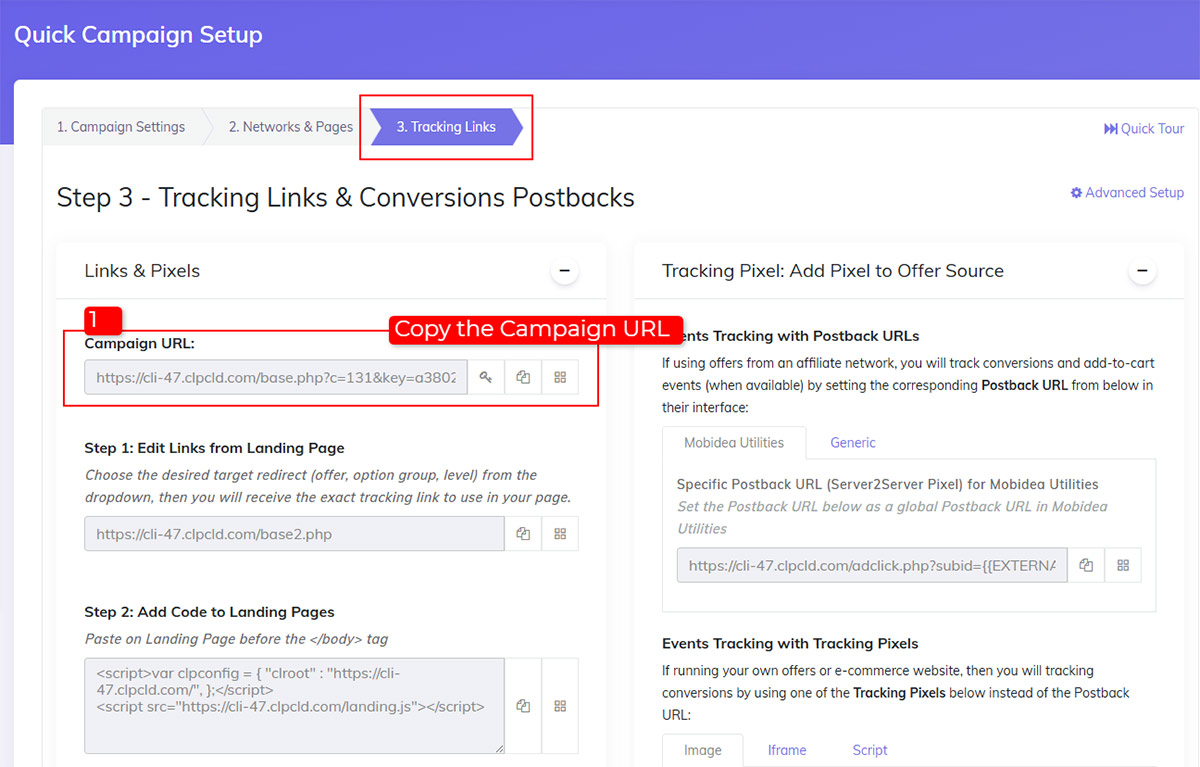
6.3: Tracking Links
Here, you’ll find all the tracking links required for your campaign.
- Copy the Campaign URL. This URL will be required to test conversions and create a campaign on 7SearchPPC.
- Enable the checkbox "Use Traffic Source Postback URL to mark conversions at your Traffic Source" to enable real-time conversion tracking between the two platforms.
- Now, click on the Save Campaign button.
A message with the text "Campaign was Saved Successfully!” will pop up on the screen. Your campaign will start to appear in the campaign list.
Step 7: Test Your S2S Postback Conversion Tracking Setup
Perform a conversion test to ensure the S2S tracking setup you’ve configured is established and working properly.
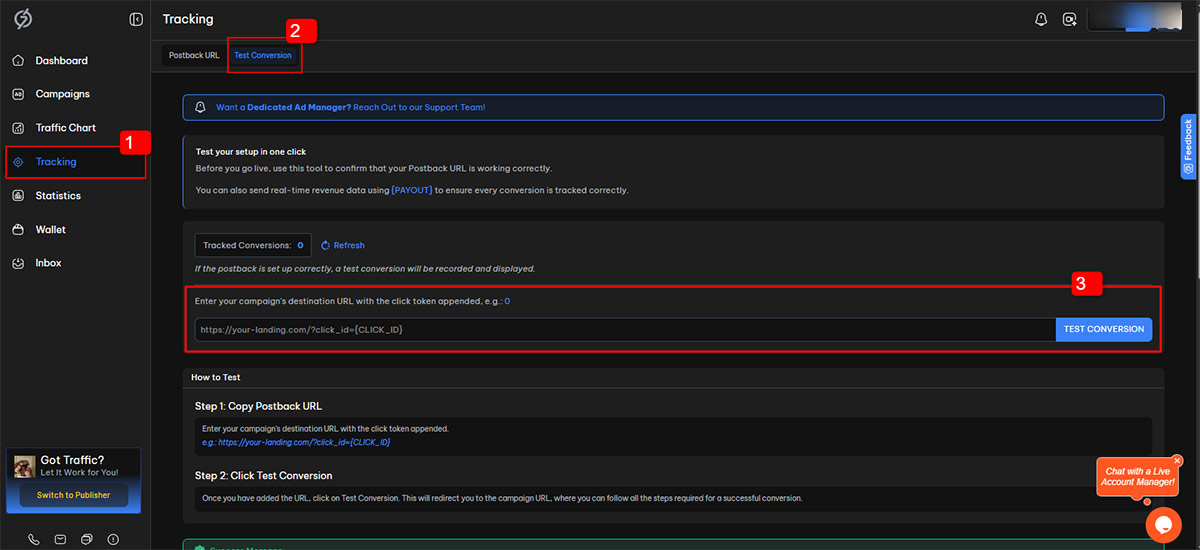
- Navigate to the 7SearchPPC dashboard and select Tracking from the side panel.
- Click on the Test Conversion tab.
- Paste the Campaign URL you copied from CPV One into the Test Conversion field.
- To execute the conversion test, click on the Test Conversion button.
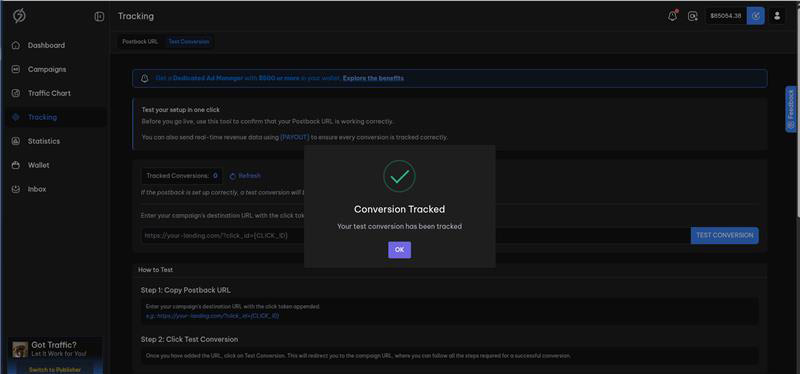
When you click on the Test Conversion button, you’ll be redirected to the conversion page. Here, you need to complete the desired action, such as a simple signup, deposit, or payment.
Once you have completed the required action, navigate back to the 7SearchPPC dashboard and open the Tracking Page. If the tracking setup is configured accurately, the conversion will be recorded on the dashboard. This means 7SearchPPC has successfully received the conversion data from CPV One.
*Postback conversions are recorded in real-time, but sometimes it may take a little longer to respond. Wait 2-3 minutes, then refresh the page to ensure the conversion is recorded. If you encounter any difficulties, you can contact our support.
Step 8: Create & Launch Your Ad Campaign on 7SearchPPC
Once the conversion is successfully recorded, move on to the final step: creating and launching your advertising campaign on the 7SearchPPC platform.
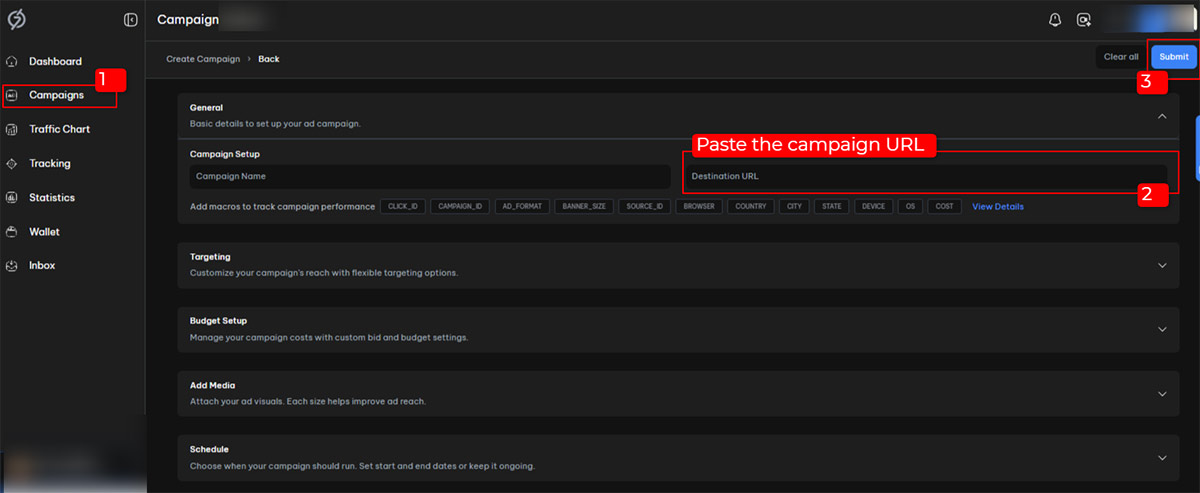
- Select Campaigns from the sidebar menu.
- Click the Create button in the top-right corner of the screen.
- Select an Ad Format of your choice, then click the Start button located at the bottom-right corner.
- Paste the Campaign URL into the destination URL field you copied from CPV One, and fill in all required details, such as the Campaign Name, Ad Title, Description, Bids, etc.
- Carefully review the details, then click the Submit button in the top-right corner to send your campaign for approval.
* If the campaign gets approved, you’ll receive a “Campaign Successfully Approved” message in your registered email.
Benefits of Integrating 7SearchPPC With CPV One
The integration partnership between 7SearchPPC and CPV One provides several benefits to advertisers of all sizes and types. Some of them are listed below:
- Accurate Conversion Tracking: In S2S postback conversion tracking, the Click_ID is stored on the server rather than in the browser, making it easier and more accurate to monitor and track conversions.
- Improves Attribution: When users decline cookies, switch devices, or delay actions, data may be lost, making it difficult to provide precise attribution. However, with postback tracking, advertisers can solve this issue and improve attribution accuracy.
- Better Decision Making: Pause, kill, or adjust campaign bids based on performance to make smarter optimization decisions. This way, advertisers can allocate more budget to winning campaigns and avoid overspending.
- Maintain Compliance: Postback conversion tracking doesn’t rely on third-party cookies, helping you maintain compliance with consumer privacy guidelines.


 Log in to Manage Your Account