How to Integrate 7SearchPPC with Binom for Accurate Campaign Tracking
Setting up Server-to-Server (S2S) postback tracking in Binom is one of the most effective ways to get accurate conversion data and optimize your campaigns with confidence.
Here’s a simple, step-by-step guide to help you set up S2S postback tracking in Binom the right way:
Step 1: Before You Begin, Make Sure You Have:
- Active 7SearchPPC Advertiser Account: The first step is to ensure you have an active 7SearchPPC advertiser account to run your ad campaigns. If you are new and do not yet have an advertiser account, you can easily sign up by following a few simple steps.
- An Active Binom Account: Make sure your Binom account is active and ready to use. If you don’t have one, create a Binom account before you continue.
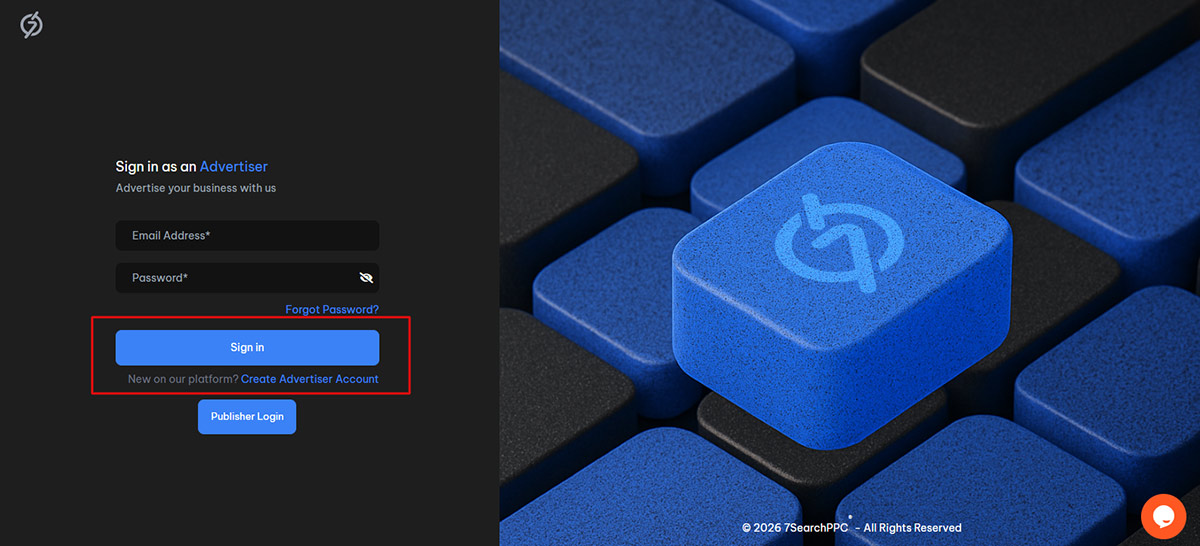
Step 2: Log In to Your 7SearchPPC Advertiser Account
To get started, log in to your 7SearchPPC advertiser account by following these steps:
- Visit the official website of 7SearchPPC
- Click the Login button in the top-right corner, then select As an Advertiser and click Continue.
- Enter your email address and password, then click on login to access your account.
- Once logged in successfully, you will be directed to the 7SearchPPC Advertiser Dashboard.
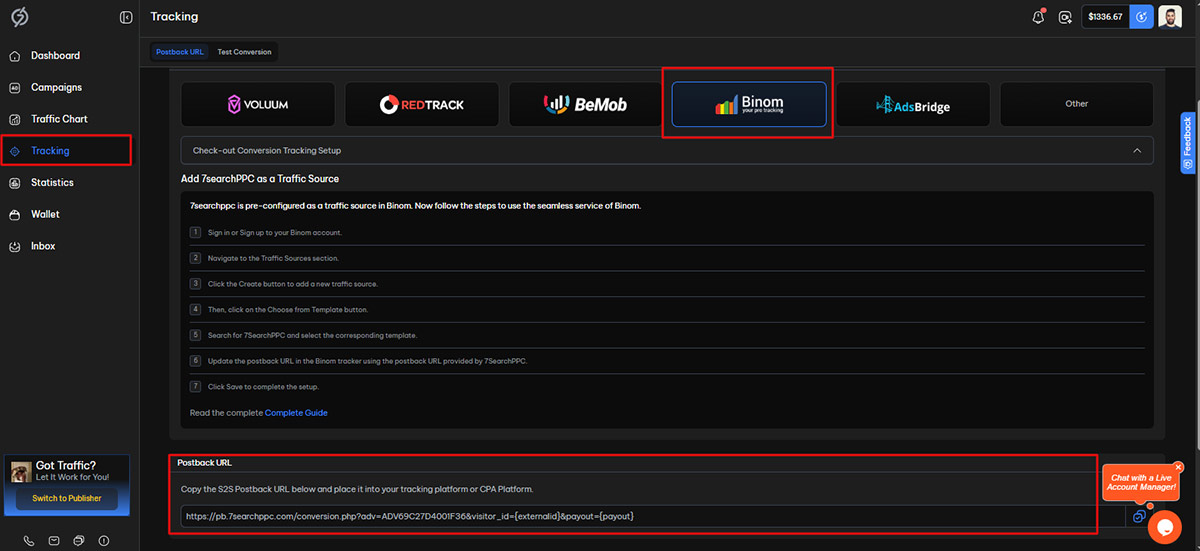
Step 3: Locate & Copy the Postback URL
After signing in to your 7SearchPPC advertiser dashboard, follow these steps:
- Click on the Tracking option on the left-hand side.
- Next, select the Binom Tracker option.
- Scroll down to find the Postback URL, then copy it for use in your tracking setup.
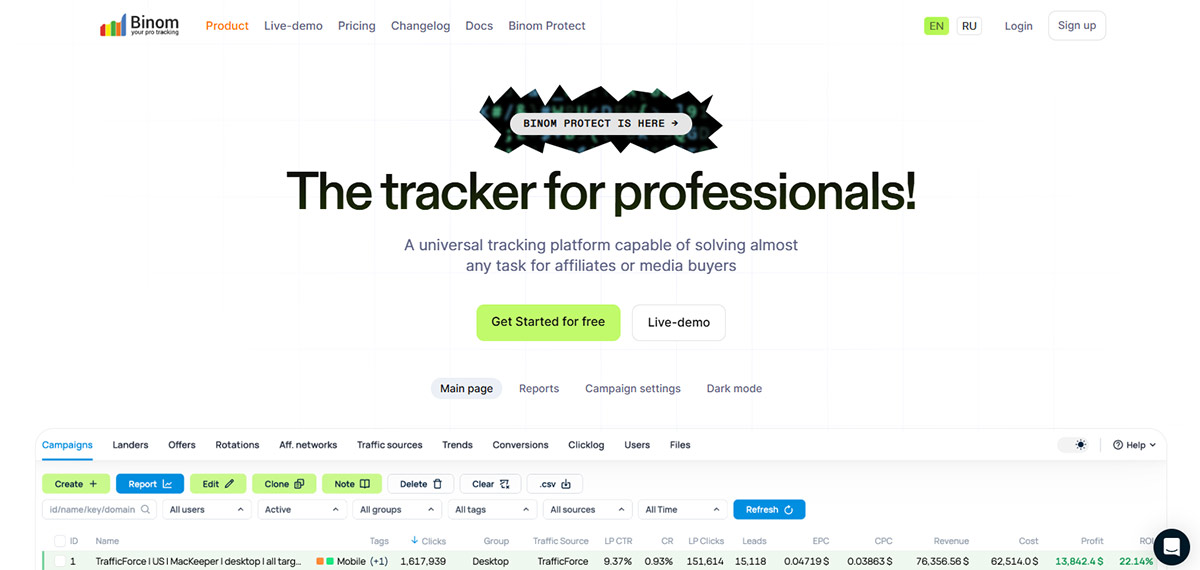
Step 4: Proceed to the Binom Platform
Once you have copied the postback URL from 7SearchPPC, log in to your tracker using the credentials you received after installing the tracker, as everything flows from there.
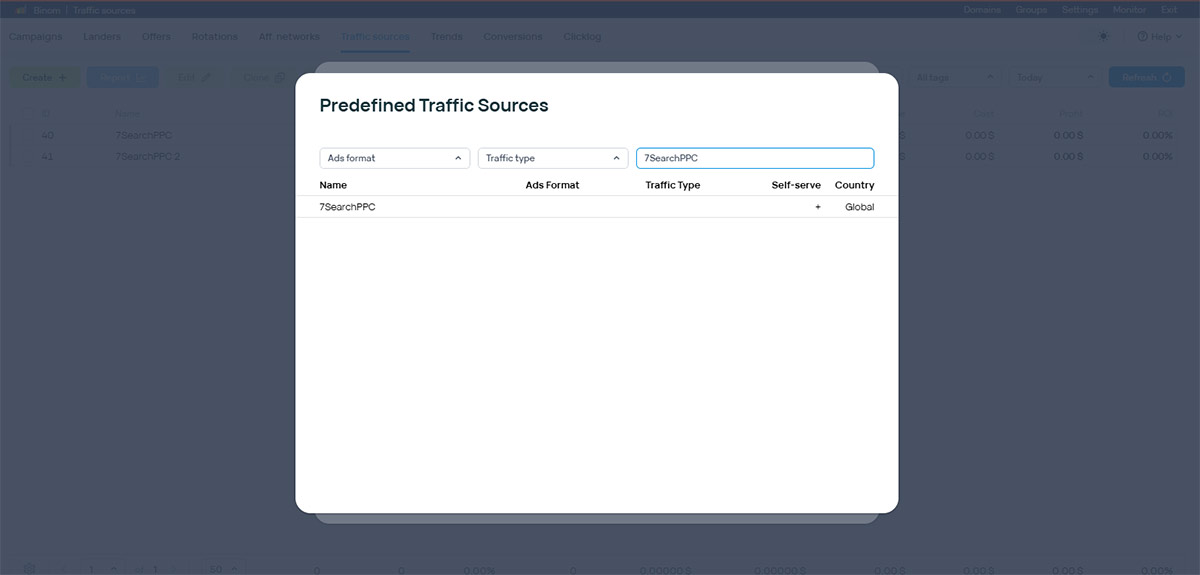
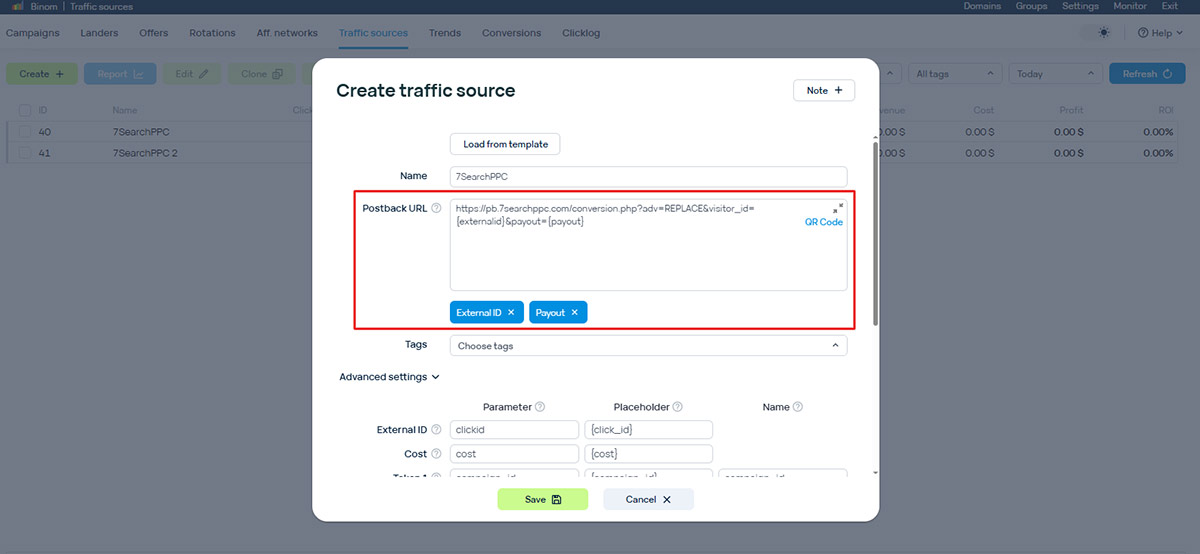
Step 5: Add 7SearchPPC as a Traffic Source
After successfully logging in, navigate to the Traffic Sources section. Once there, click on the Create button.
A new page will appear. At the top of this page, select the Load from Template option. In the search bar, type 7SearchPPC.
Select 7SearchPPC, go to the Postback URL section, and then
- Replace the existing URL with the Postback URL you copied from 7SearchPPC.
- Click Save to proceed.
Step 6: Binom Integration for Affiliate Networks
Once you’ve integrated 7SearchPPC as your traffic source, the next crucial step is to connect it with your affiliate network to start tracking conversions effectively.
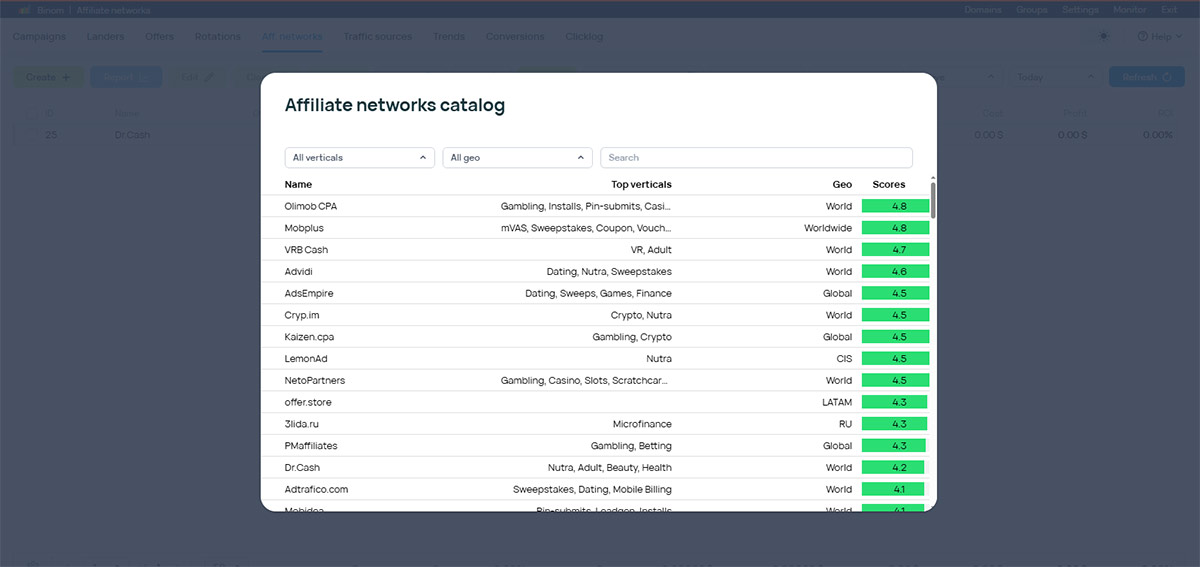
To get started, navigate to the Affiliate Network option located next to the Traffic Sources section. Simply click on it to proceed.
Once you’re inside, follow these steps:
- Click on the Create button
- Select Load from Catalog to browse the available affiliate networks
- Choose the network from which you’ve selected your offer
- Configure the required settings as prompted
- Click Save to complete the setup
Here is a guide to setting up the Binom affiliate network. Feel free to review it for a better understanding.
6.1: For Custom Website
If you are using a custom website, skip the above process and proceed directly to creating an offer.
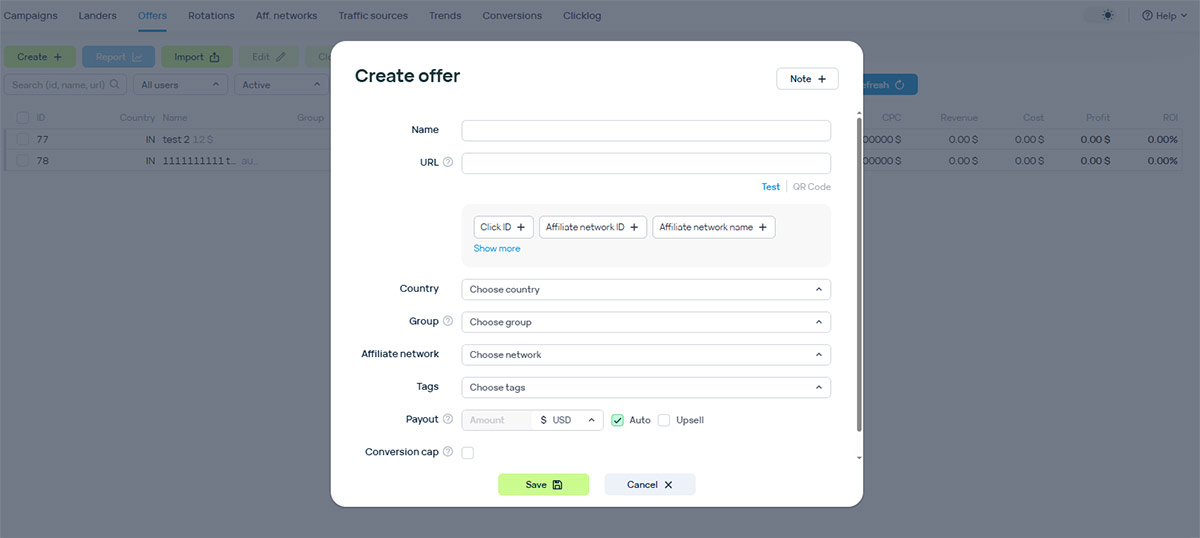
Step 7: Proceed to Create an Offer
The next step is to create an offer. To do this, navigate to the Offers section and click on Create.
Offer setup may vary depending on whether you are working as a custom advertiser or an affiliate. Below is a clear breakdown of both scenarios:
7.1: For Custom Advertisers
If you are a custom advertiser, you will need to configure the offer details:
- Click Create to add a new offer.
- Name the offer clearly so it is easy to find later.
- Enter the offer URL.
- Select ClickID, then click See more to choose the tokens required to track conversions (this is mandatory).
- Select the tokens according to your tracking preferences.
- Choose the target country (leave blank for worldwide offers), then select a group and tags.
- Set a fixed payout or enable Auto, then click Save.
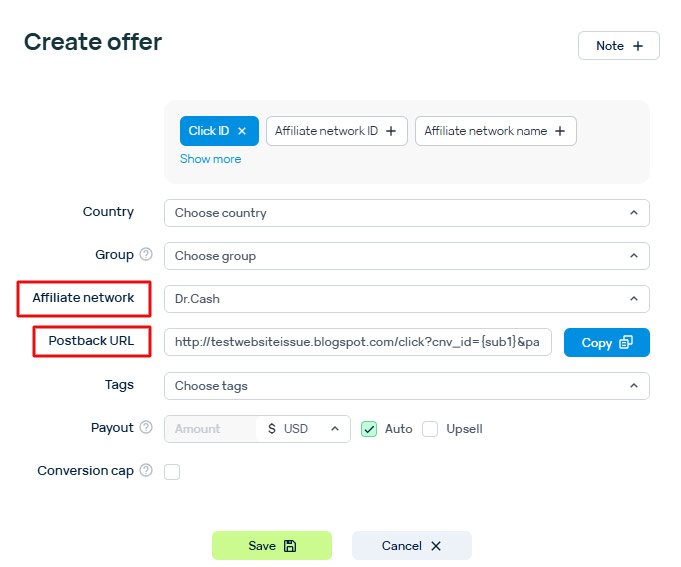
7.2: For Affiliates
Affiliates are requested to follow the steps below:
- Go to the Offer Page and select the affiliate network you chose earlier.
- Most fields will be filled in automatically, as they were already set up in the affiliate network options.
- You only need to fill in the following details:
- Tags
- Payout
- Group
- Country
Discover how to easily add offers on Binom with this step-by-step guide.
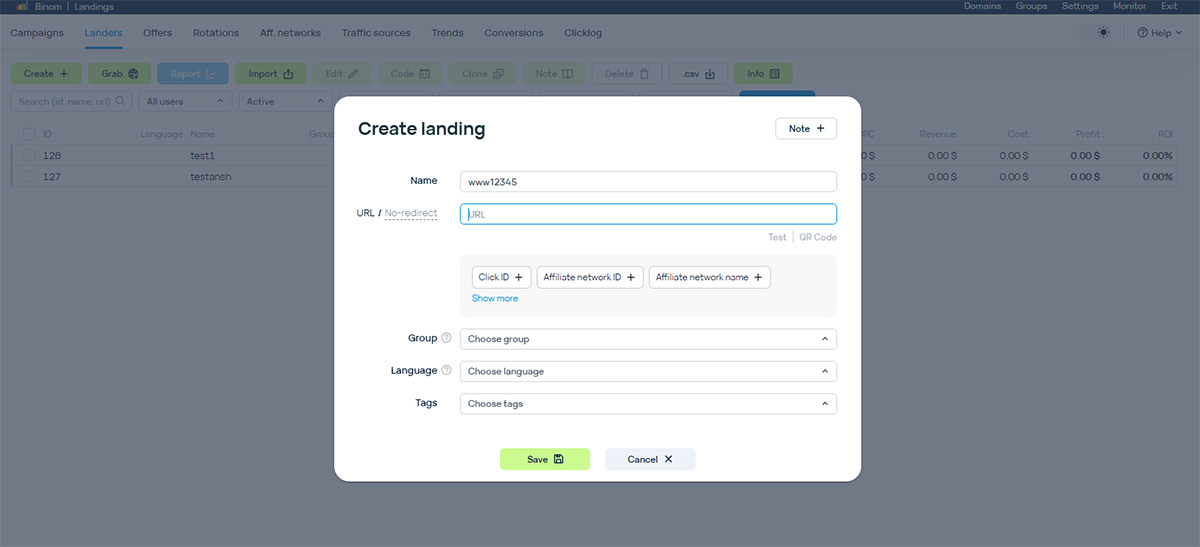
Step 8: Set up Your Landers
Now, you need to set up a lander. To do this, go to the Lander section and click the Create button. Then, follow the given steps.
- Enter a clear name for the lander.
- Add the landing page URL.
- Include any tracking macros.
- Select the group.
- (Optional) Set the language and additional grouping parameters.
- Add relevant tags and then click Save.
Refer to the Binom lander setup guide for best practices and detailed instructions.
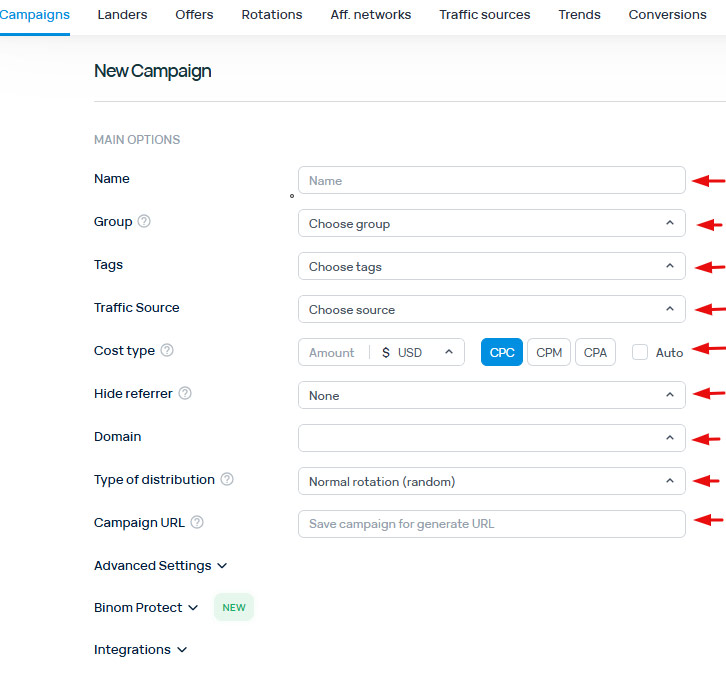
Step 9: Create a New Campaign
After setting up the Lander, you need to create a campaign. To do this, click on the Campaigns section and then tap on Create. The New Campaign page will appear, where you need to fill in the following options.
- Name: Give your campaign a descriptive name.
- Group: Organize your campaign by country, language, or traffic type (optional).
- Traffic Source: Select the traffic source you added previously.
- Cost Type: Choose CPC, CPM, or CPA. You can also choose the Auto option.
Below, you also need to fill in other fields such as Hide Referrer, Domain, Type of Distribution, Campaign URL, etc.
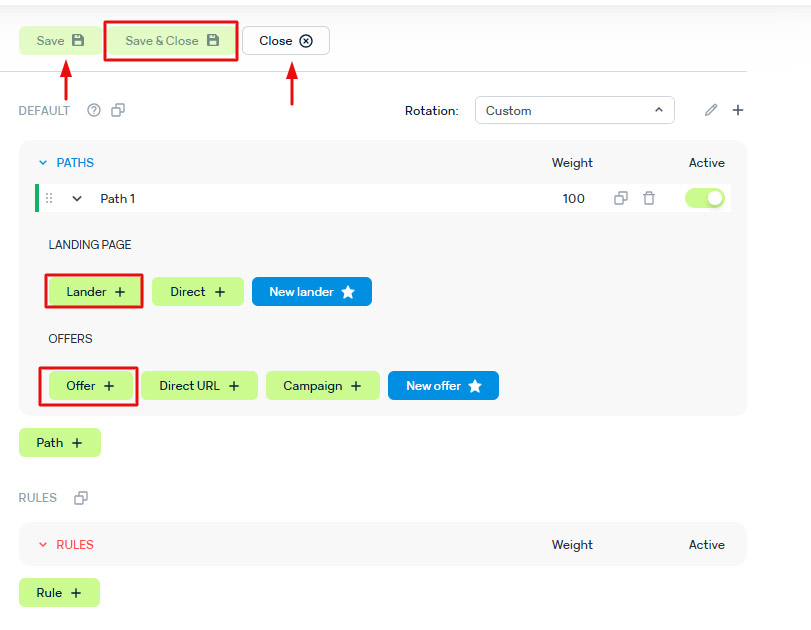
9.1: Choose Landing Page and Offers
After filling out your campaign details, move to the right section and choose:
- the landing page that you’ve already created.
- the offer you created earlier.
Once that’s done, simply click Save & Close. Your campaign is now set up!
Step 10: Copy the Campaign URL from Binom
Once you have successfully created a campaign on Binom, you can simply copy the campaign URL from the binom dashboard.
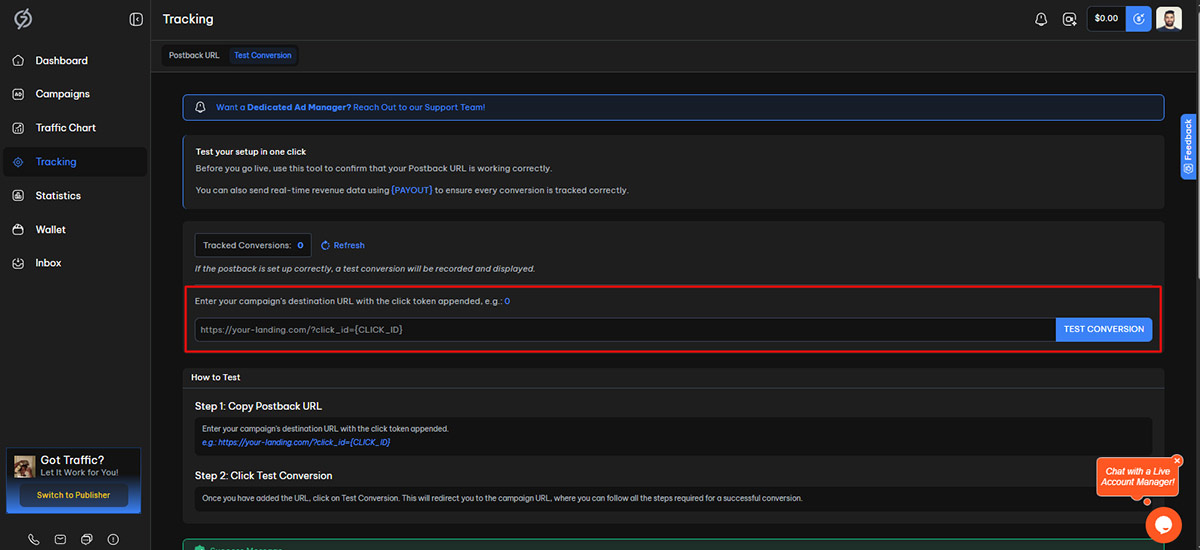
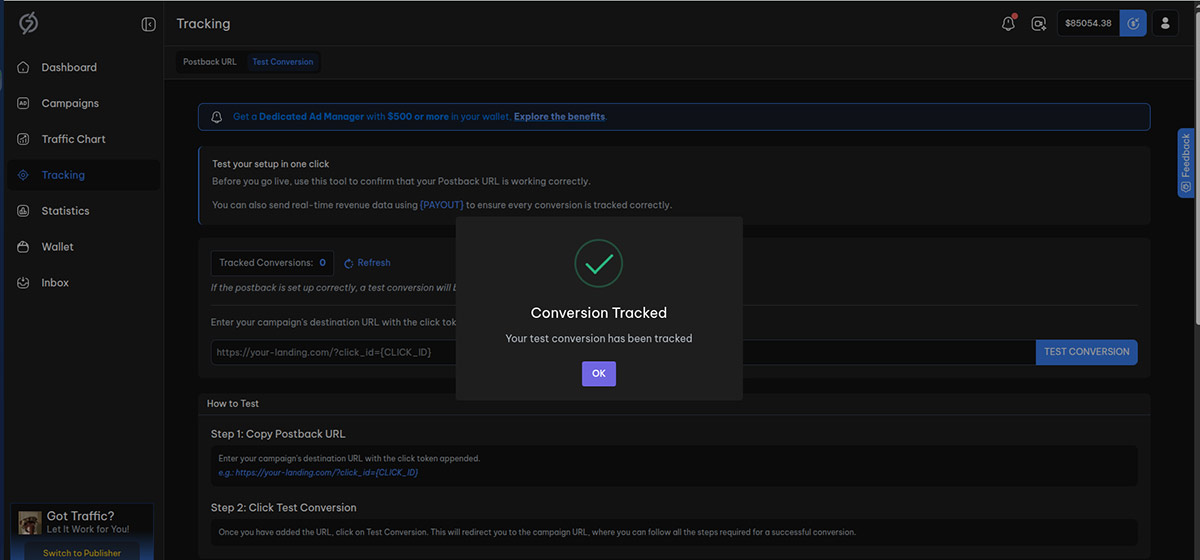
Step 11: Test Your S2S Tracking Setup
Before finishing, make sure your conversion tracking is working properly. To do this, follow these steps:
- In your 7SearchPPC dashboard, go to Tracking.
- Select Test Conversion.
- Paste the campaign URL you received from Binom.
- Run the test to ensure everything is tracking correctly.
After running the test:
- You’ll be taken to the page where the conversion occurs—complete the action (e.g., submit a form or register).
- Return to the Conversion Tracking page. If everything is set up correctly, it will display Test Conversions Tracked: 1, confirming the test was successful.
You can also verify the conversion in your Binom dashboard to ensure the data is being tracked accurately.
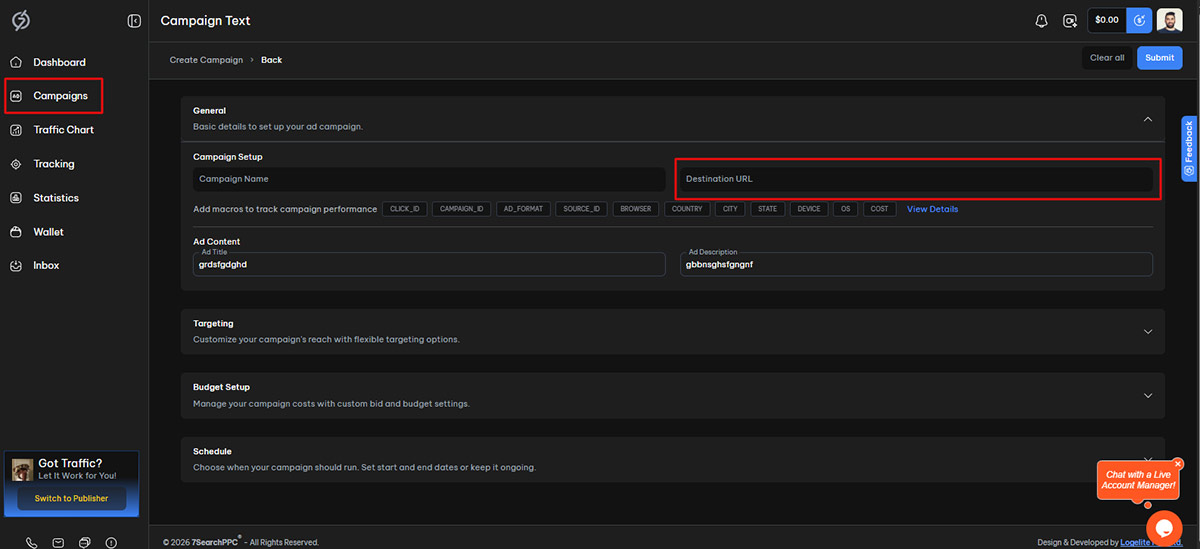
Step 12: Create Your Campaign on 7SearchPPC
After successfully testing your conversion, move on to creating a campaign on 7SearchPPC. Fill in all the required details for your ad campaign as prompted on the platform. Once everything is completed, paste the URL you copied from Binom into the Destination URL field, and then click Submit to launch your ad campaign.
To gain a clearer understanding, look for binom documentation, as it makes things easier for you.
What Advantages 7SearchPPC Advertisers Gain from This Integration
- Enhanced Campaign Tracking Accuracy: Integration with Binom allows 7SearchPPC advertisers to track clicks, conversions, and ROAS with highly precise real-time data.
- Advanced Traffic Optimization: Advertisers can analyze performance deeply and optimize campaigns by identifying high-performing sources, GEOs, and audience segments efficiently.
- Exclusive Benefits: When advertisers sign up for the tracker using our link, they receive the first month free and enjoy a 40% discount on their second month’s payment, making it more cost-effective to get started.


 Log in to Manage Your Account