Setting up Postback S2S (Server-to-Server) tracking in BeMob lets you track conversions and improve your campaigns more accurately. In simple terms, it connects your traffic source and offer directly through servers, so conversions are tracked more reliably.
Here’s an easy, step-by-step guide to help you set up S2S postback tracking in BeMob.
Before beginning the S2S tracking setup, make sure you have checked all of the required boxes below.
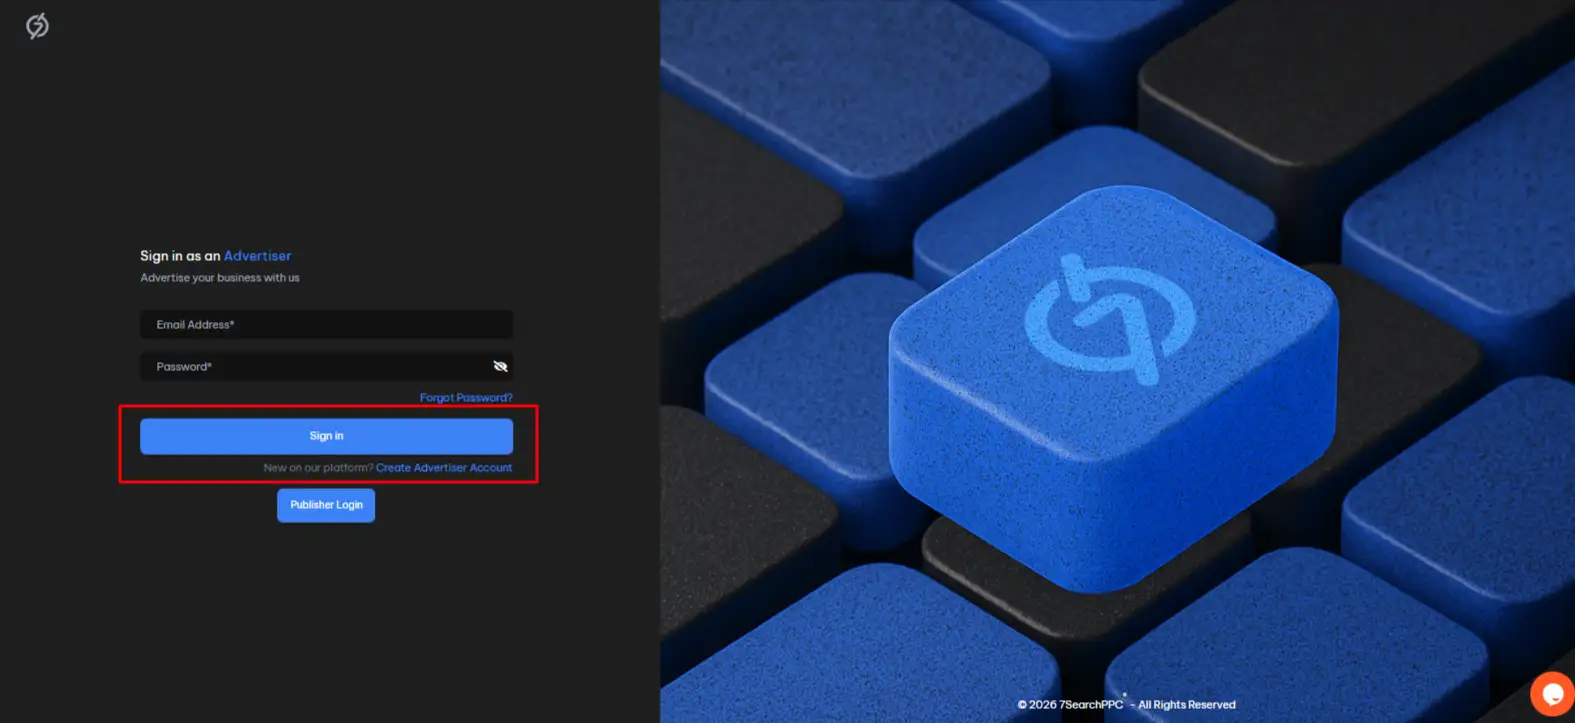
With all the required steps completed, you’re ready to move forward with S2S postback tracking. To do this, log in to your 7SearchPPC advertiser account. If you already have an account, follow the steps below to sign in.
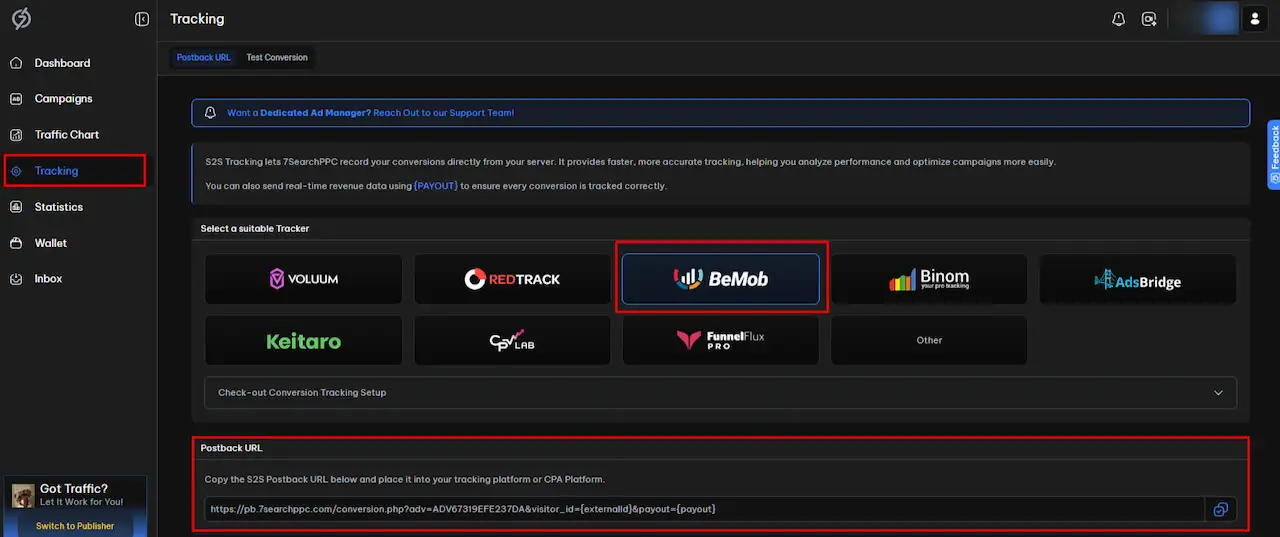
Now that you have signed in to your 7SearchPPC advertiser account, locate the Tracking section and click on it.
After copying the Postback URL from 7SearchPPC, switch to the BeMob ad tracking platform and log in to your account using your credentials.

Once you’re logged into your BeMob account, the dashboard will open. Click the “Traffic Sources” button, then click the dropdown arrow next to the “New” button. Select “New From Template.”
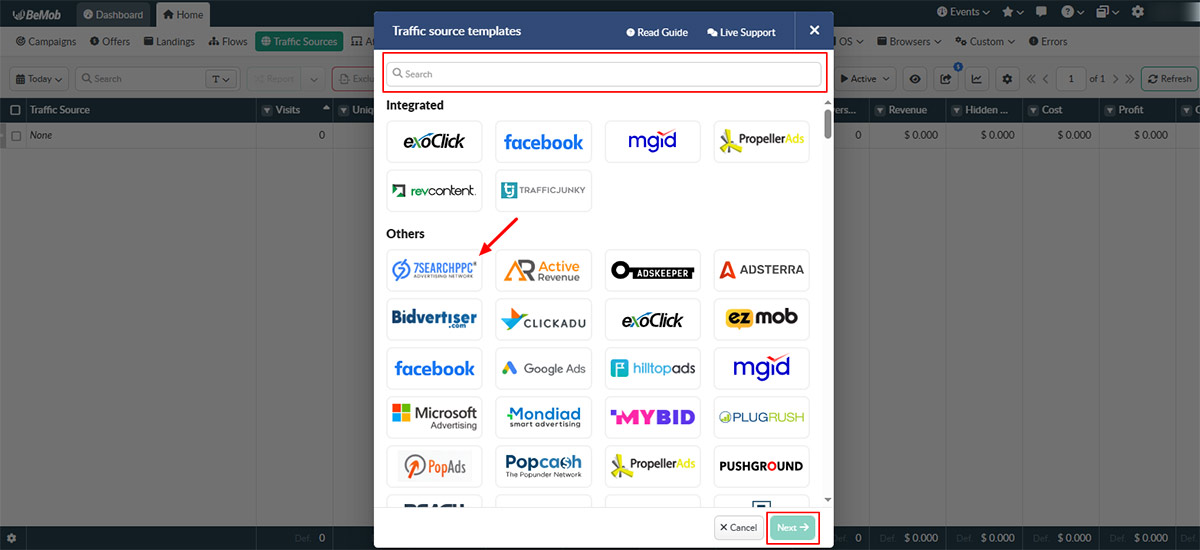
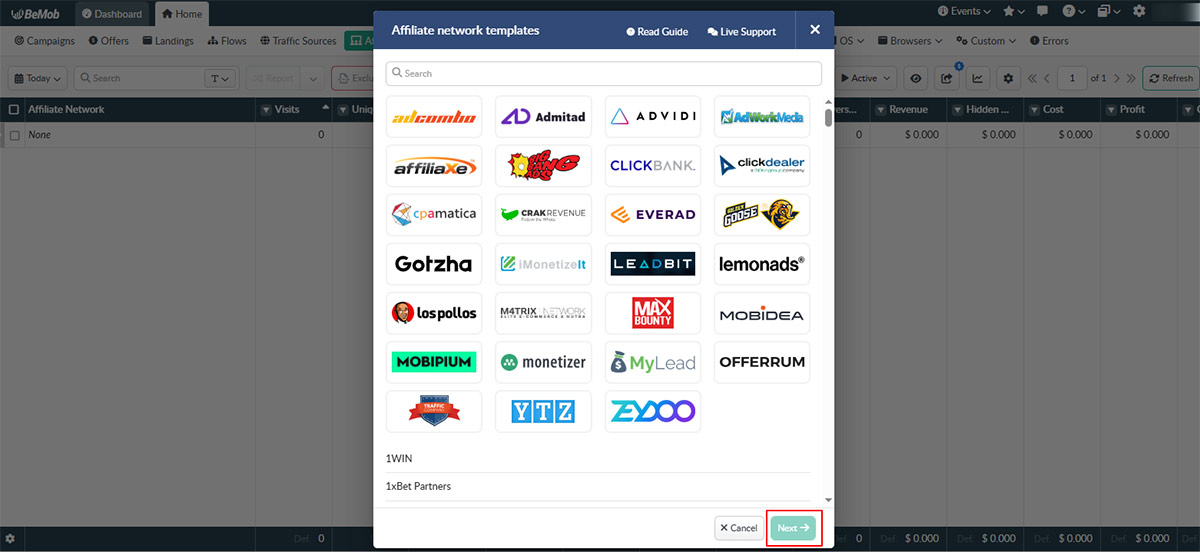
The “Traffic Source Templates” page will now open. You can either enter “7SearchPPC” in the search bar or, if it is visible in the “Others” section, directly click on it and then hit “Next.”

The “Create Traffic Source” section will open. Locate the “Postback URL” section and replace the existing postback URL with the one you copied from the 7SearchPPC advertiser dashboard, and click “Save.”
After integrating 7SearchPPC as your traffic source, the next phase is to connect your affiliate network, configure your offer, and set up your landing inside BeMob.
This step ensures that conversions from your traffic source are properly routed through BeMob, tracked accurately, and attributed to the correct offer.
Navigate to the Affiliate Networks section in your BeMob dashboard. Click it, then tap the “Dropdown” button next to the “New” button, select “New From Template”.
Here, you’ll:
We recommend following BeMob’s official walkthrough for adding and configuring affiliate networks. It provides field-level explanations and token mapping guidance to ensure your S2S tracking works correctly.

Once your affiliate network is added, proceed to the “Offers” section in BeMob.
When creating your offer:
For detailed parameter setup and advanced offer configuration, refer to BeMob’s official Offer Setup documentation.

If your campaign includes a landing page, go to the Landings section and:
BeMob provides step-by-step instructions for different landing configurations, so reviewing their Landing Setup guide will help you match the setup to your campaign structure.

Once you have completed the offer and landing page setup, proceed to set up the campaign on BeMob to obtain the “Destination URL”. To do this, navigate to the "Campaigns" button available at the top of the BeMob dashboard. Click on it, then click on the "New" button.
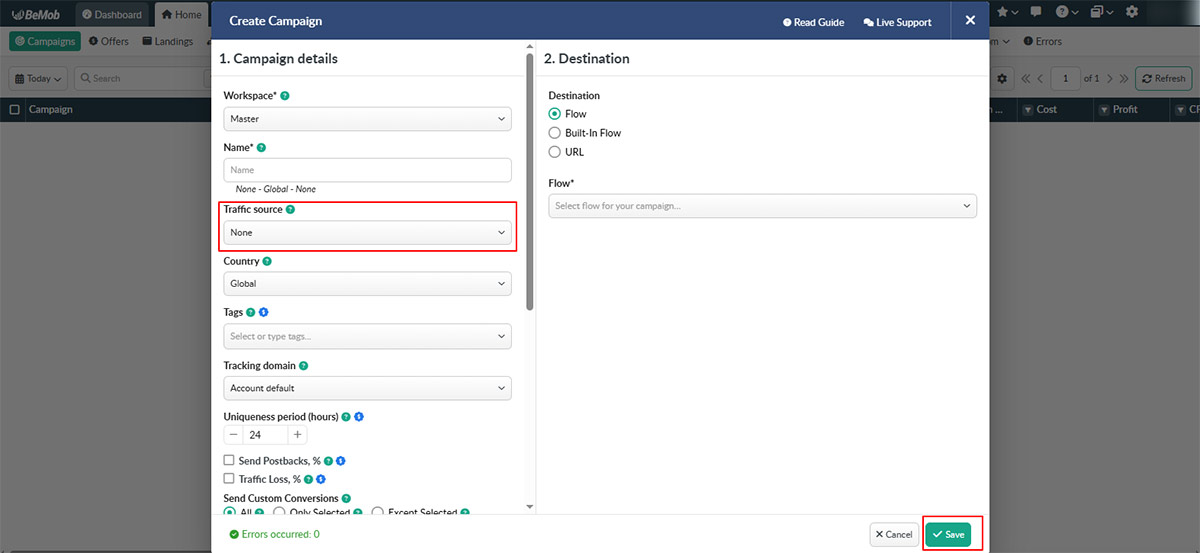
Once you click the “New” button, the “Create Campaign Setup” page will open. Enter “7SearchPPC” in the “Traffic Source” field and fill in the other mandatory details, such as Workspace, Name, Country, Tags, etc. After filling in all the details, click “Save.”
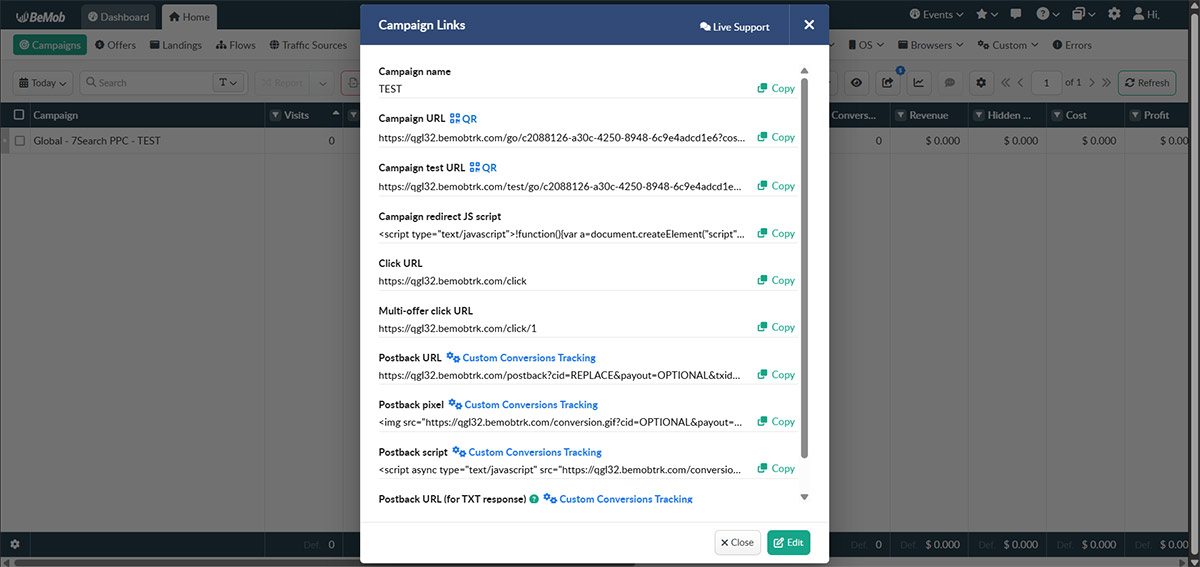
After the campaign setup, copy the generated “Campaign URL,” as it will be needed in the next step.
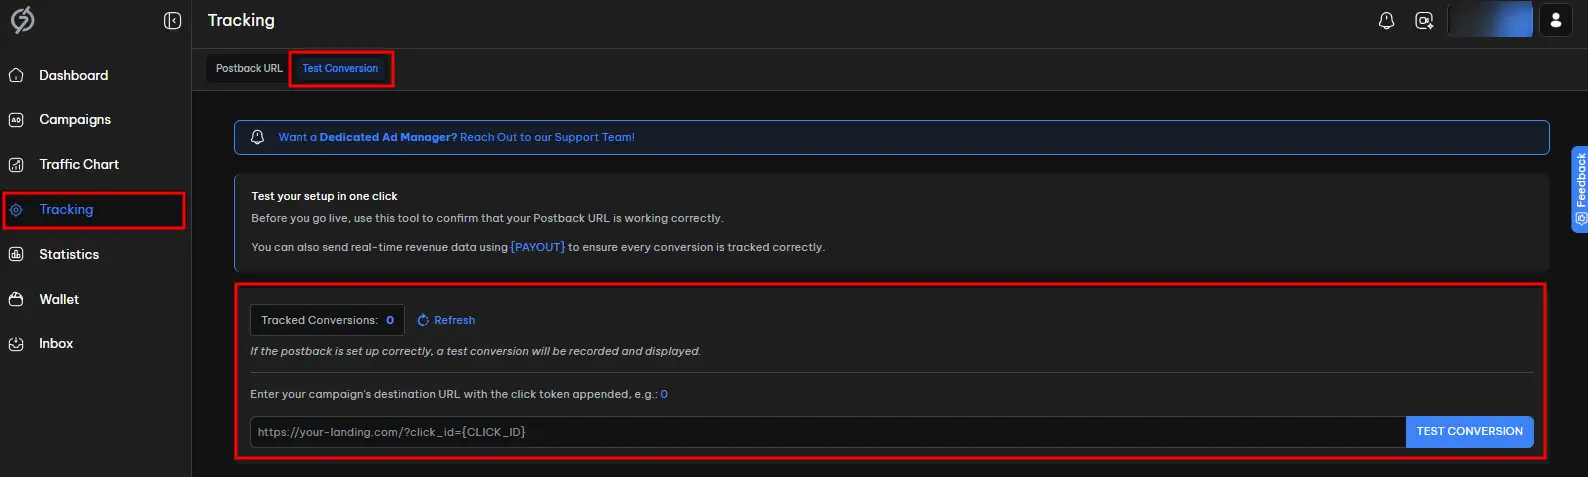
Make sure your conversion tracking is set up correctly. To do this, follow the steps below.
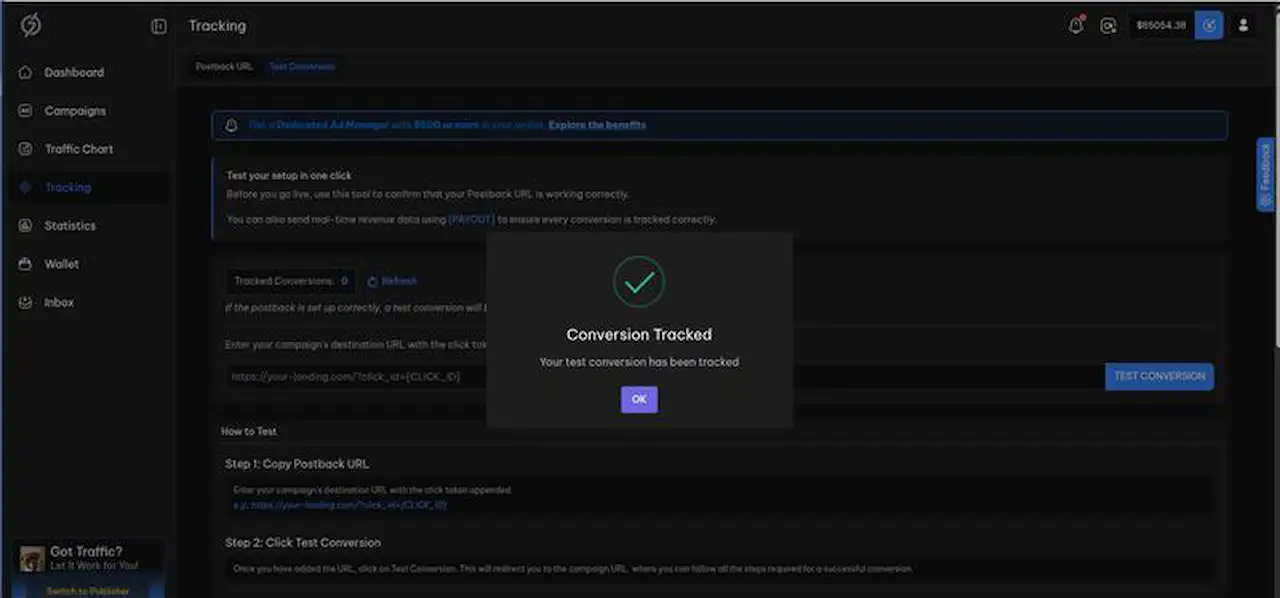
After completing the action, go back to the conversion tracking page. If everything is configured properly, you will see “Test Conversions Tracked: 1,” confirming that 7SearchPPC has successfully received your conversion data.
You’ll also be able to view the conversion details within the BeMob tracker.
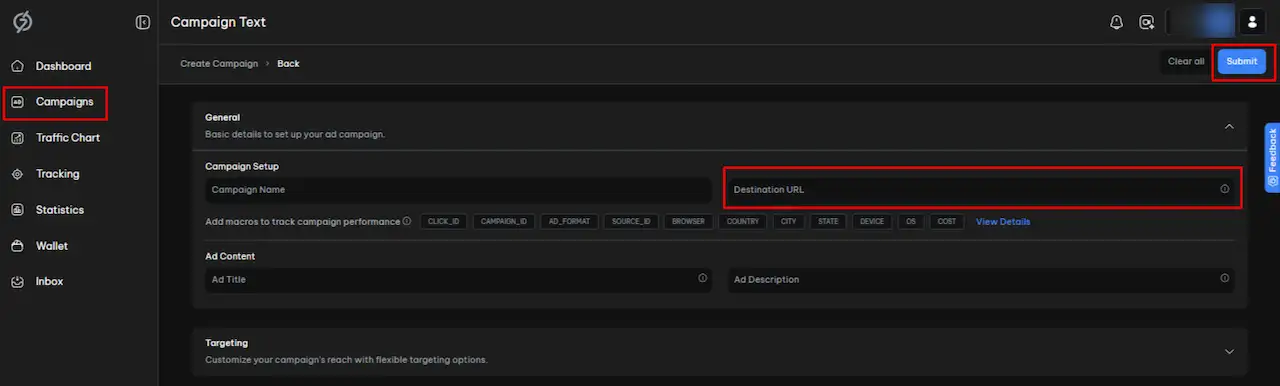
After you’ve confirmed that your conversion tracking is working properly, you can move forward with setting up your campaign. Below are the steps:
The integration partnership between 7SearchPPC and BeMob offers multiple benefits for advertisers. Explore them below.
 Log in to Manage Your Account
Access your dashboard to manage and optimize ads.
Check your stats and grow your ad revenue.
Start Growing With 7SearchPPCWant to promote your products, services, or offers.
Want to monetize your website, blog, or social media traffic.